Task 03: Assign permissions for custom detection rules
This task is a prerequisite for creating custom detection rules.
-
Open a new browser tab, go to MS Defender, and sign in.
-
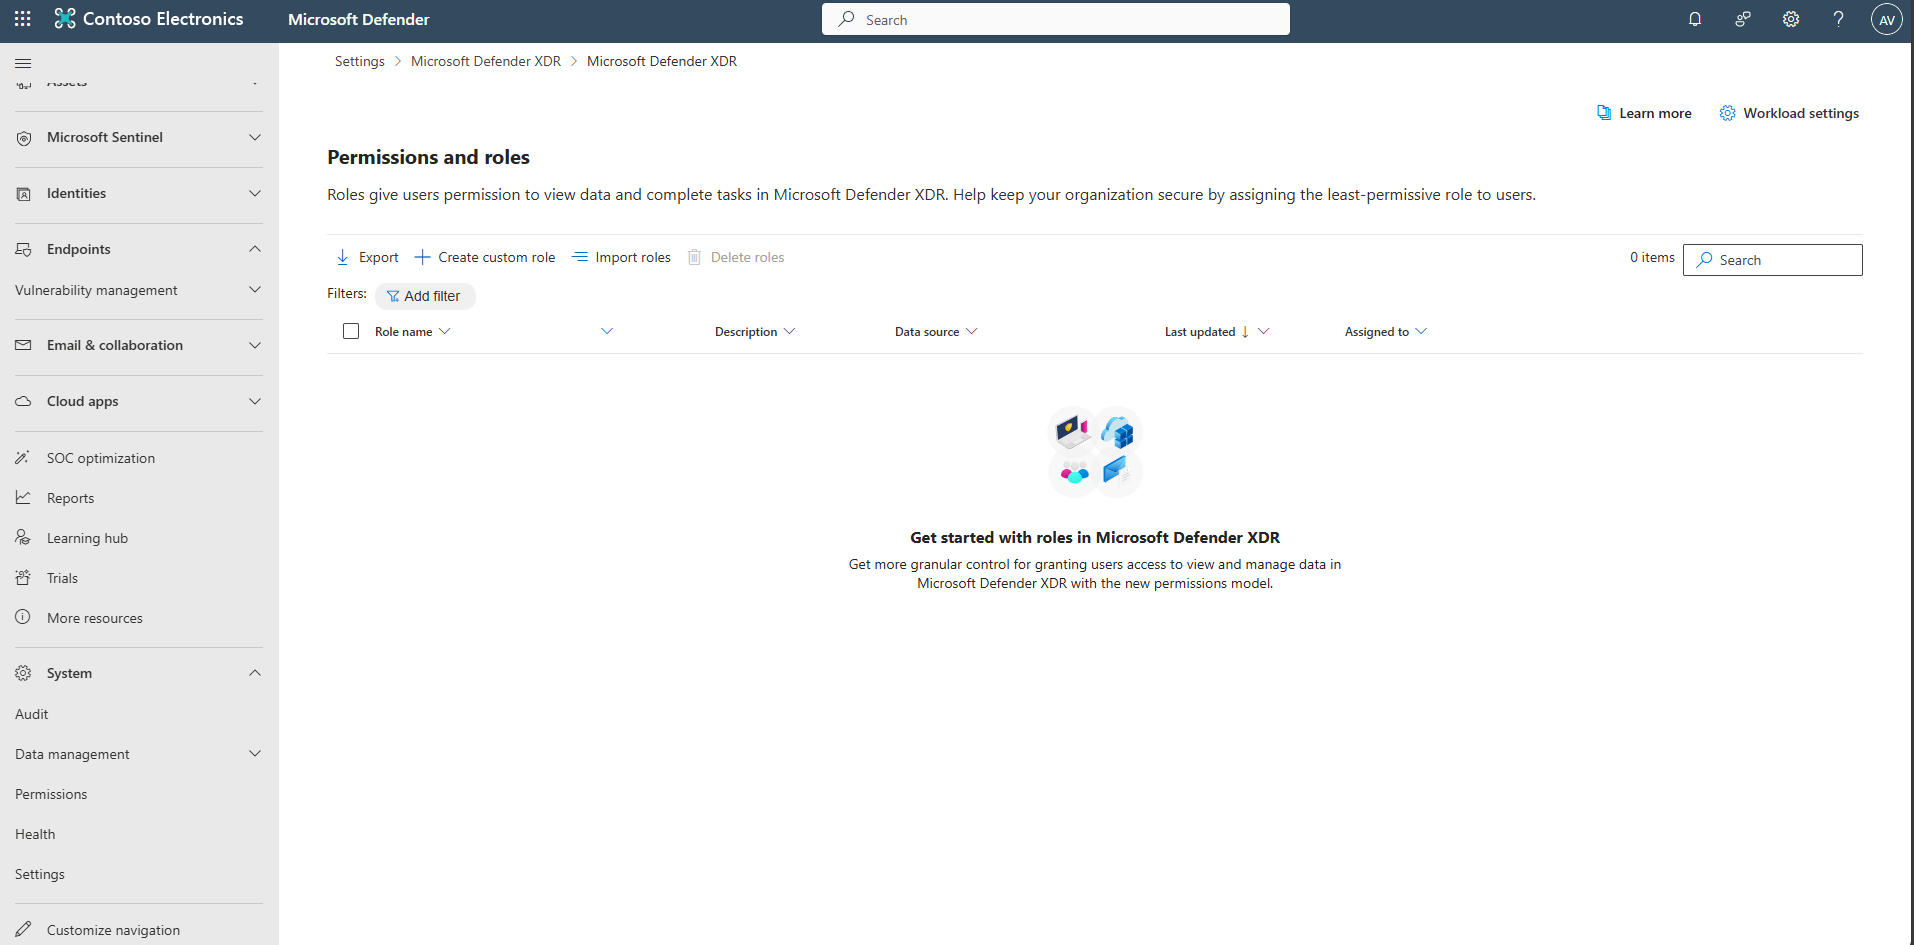
In the Defender portal’s leftmost pane, go to System > Permissions.
-
Select Microsoft Defender XDR > Roles.
-
Select Create custom role.
-
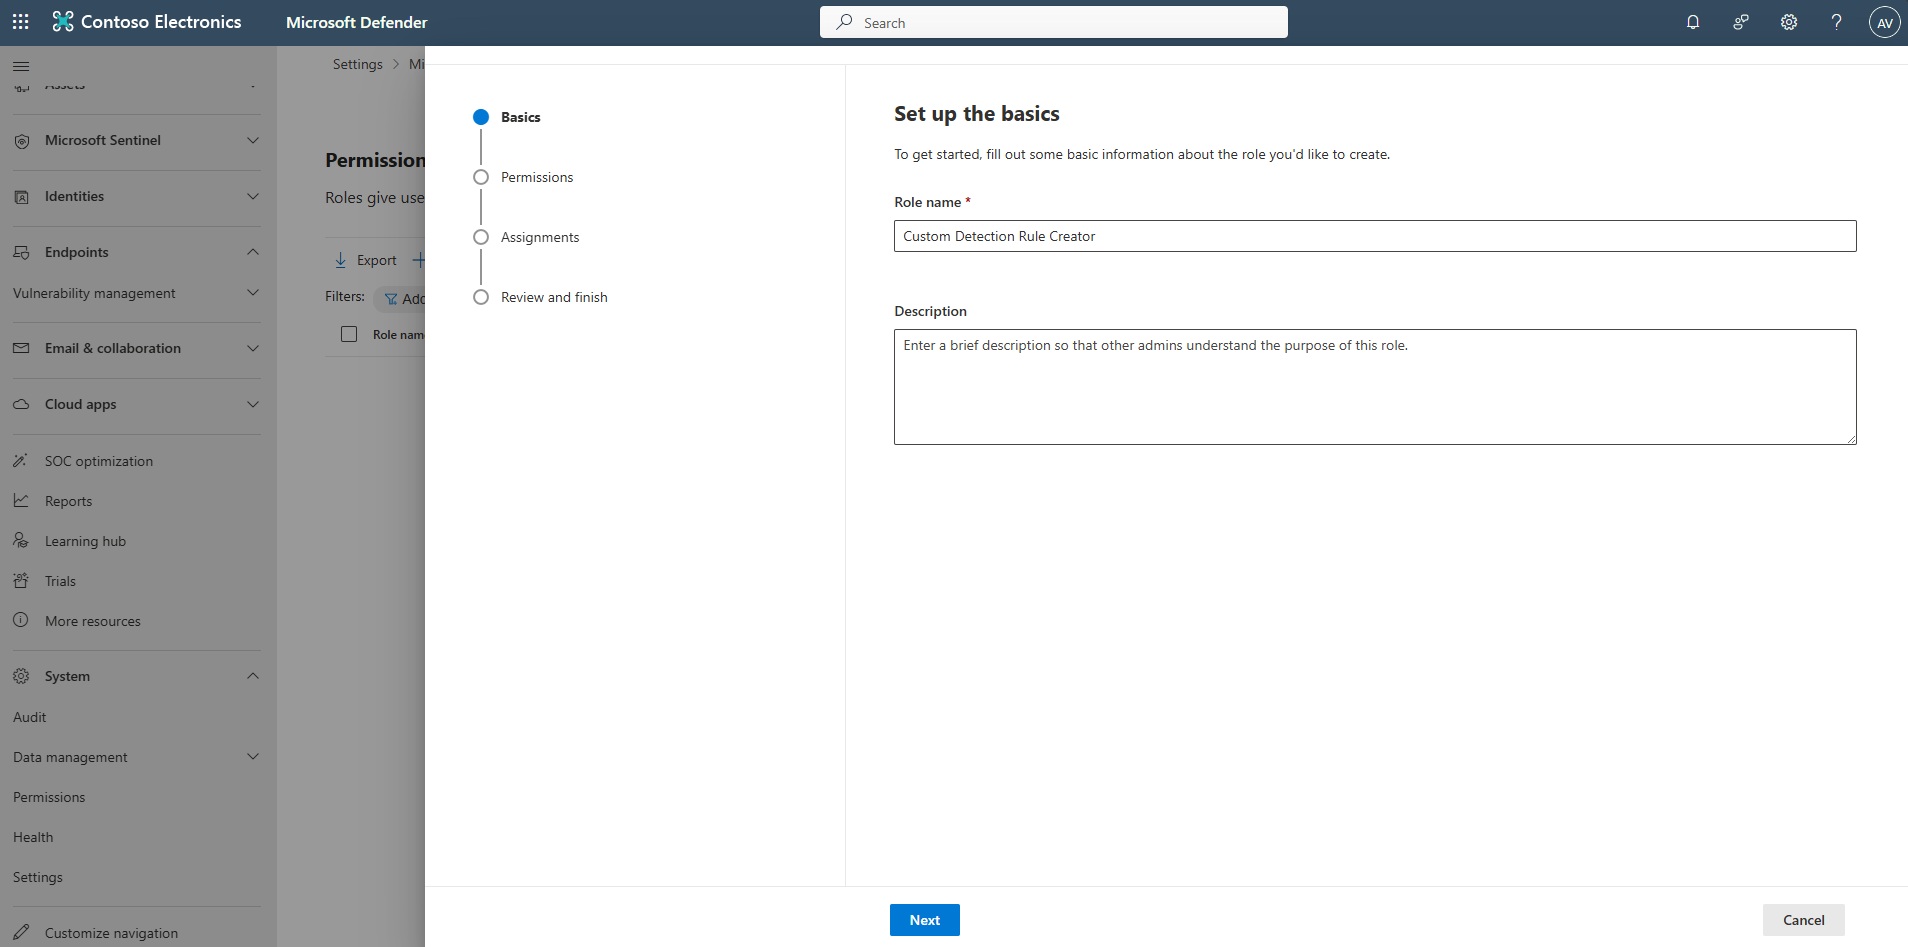
Name the role +++Custom Detection Rule Creator+++, then select Next.
-
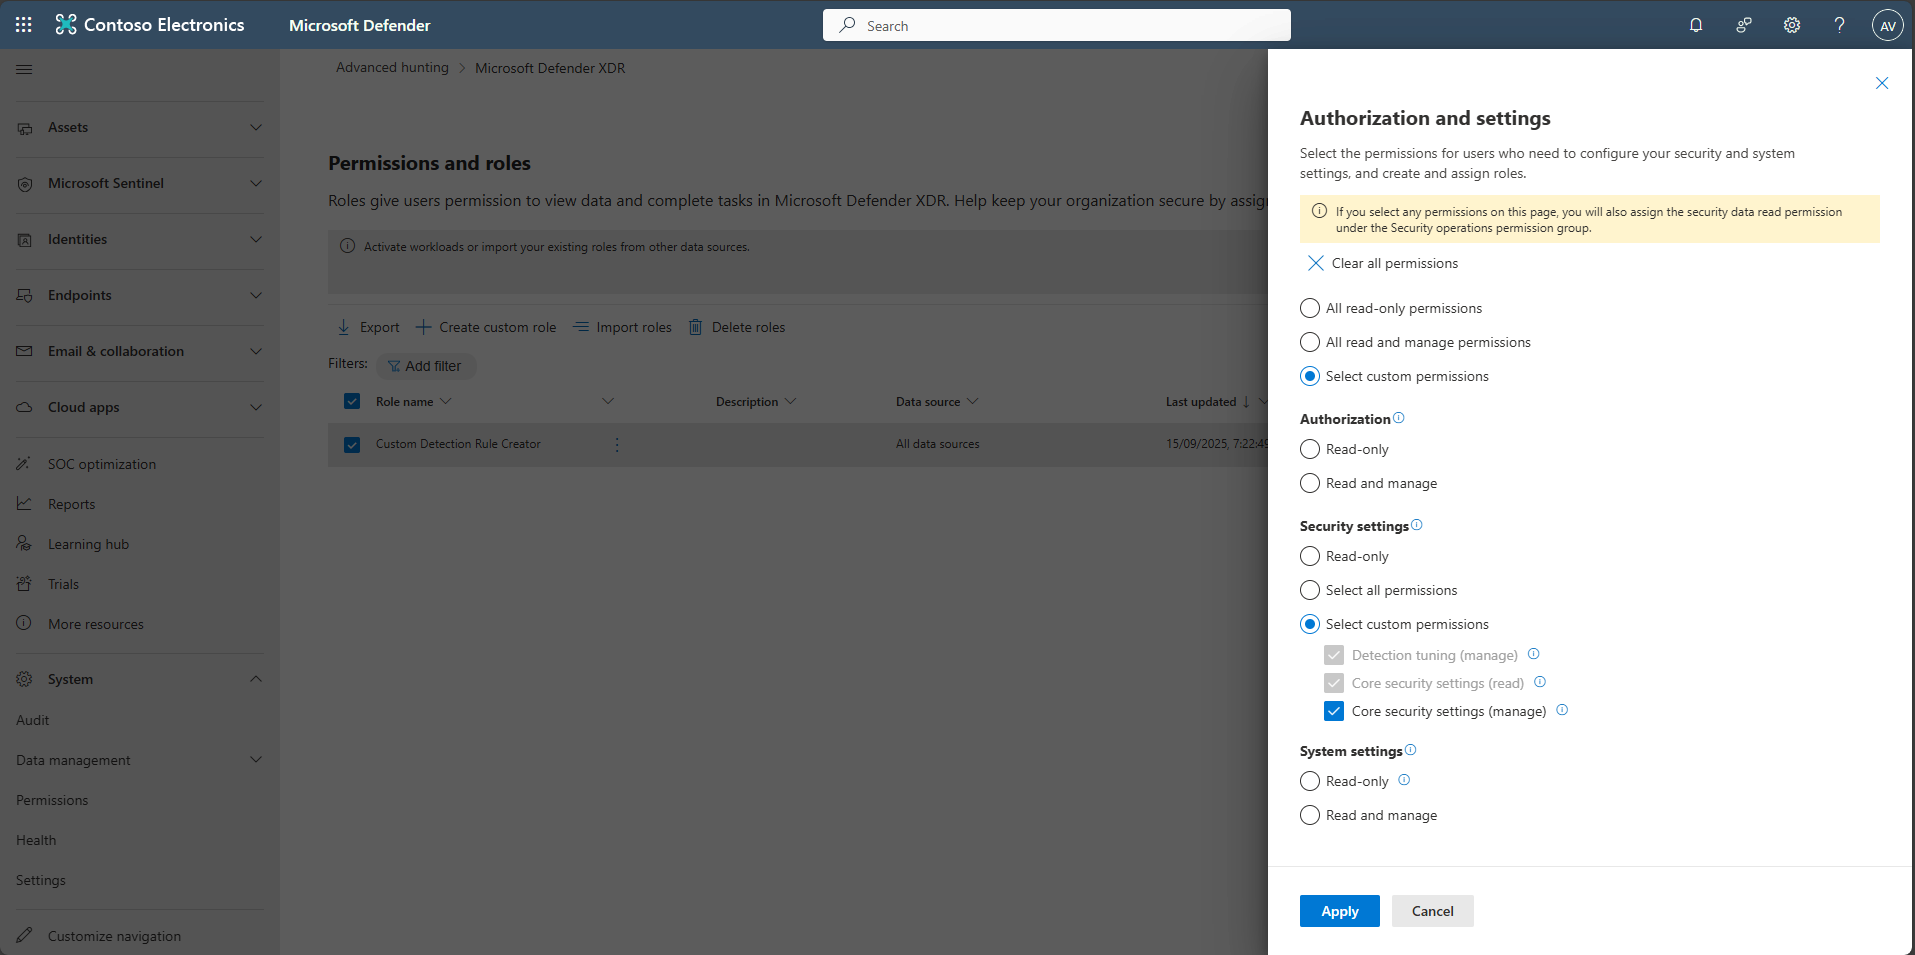
Under Choose permissions, select Authorization and settings.
-
In the flyout, select Select custom permissions.
-
Under Security settings, select Select custom permissions > Core security settings (manage) > Apply.
-
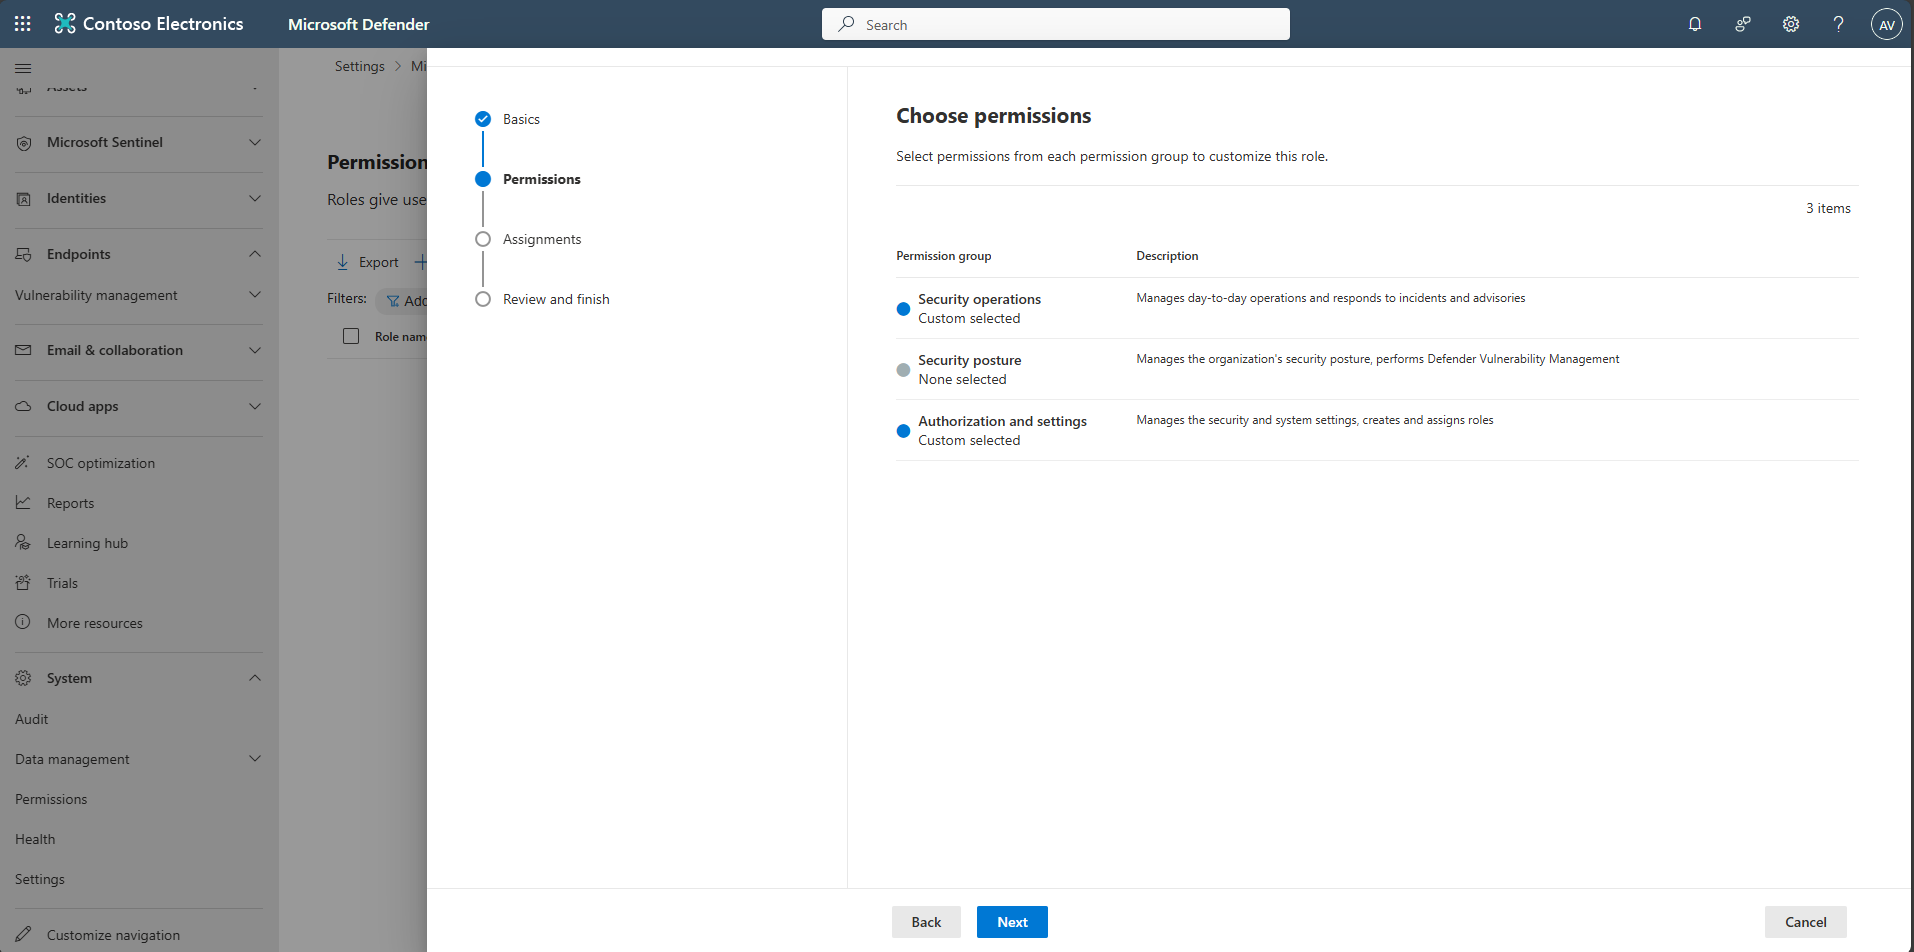
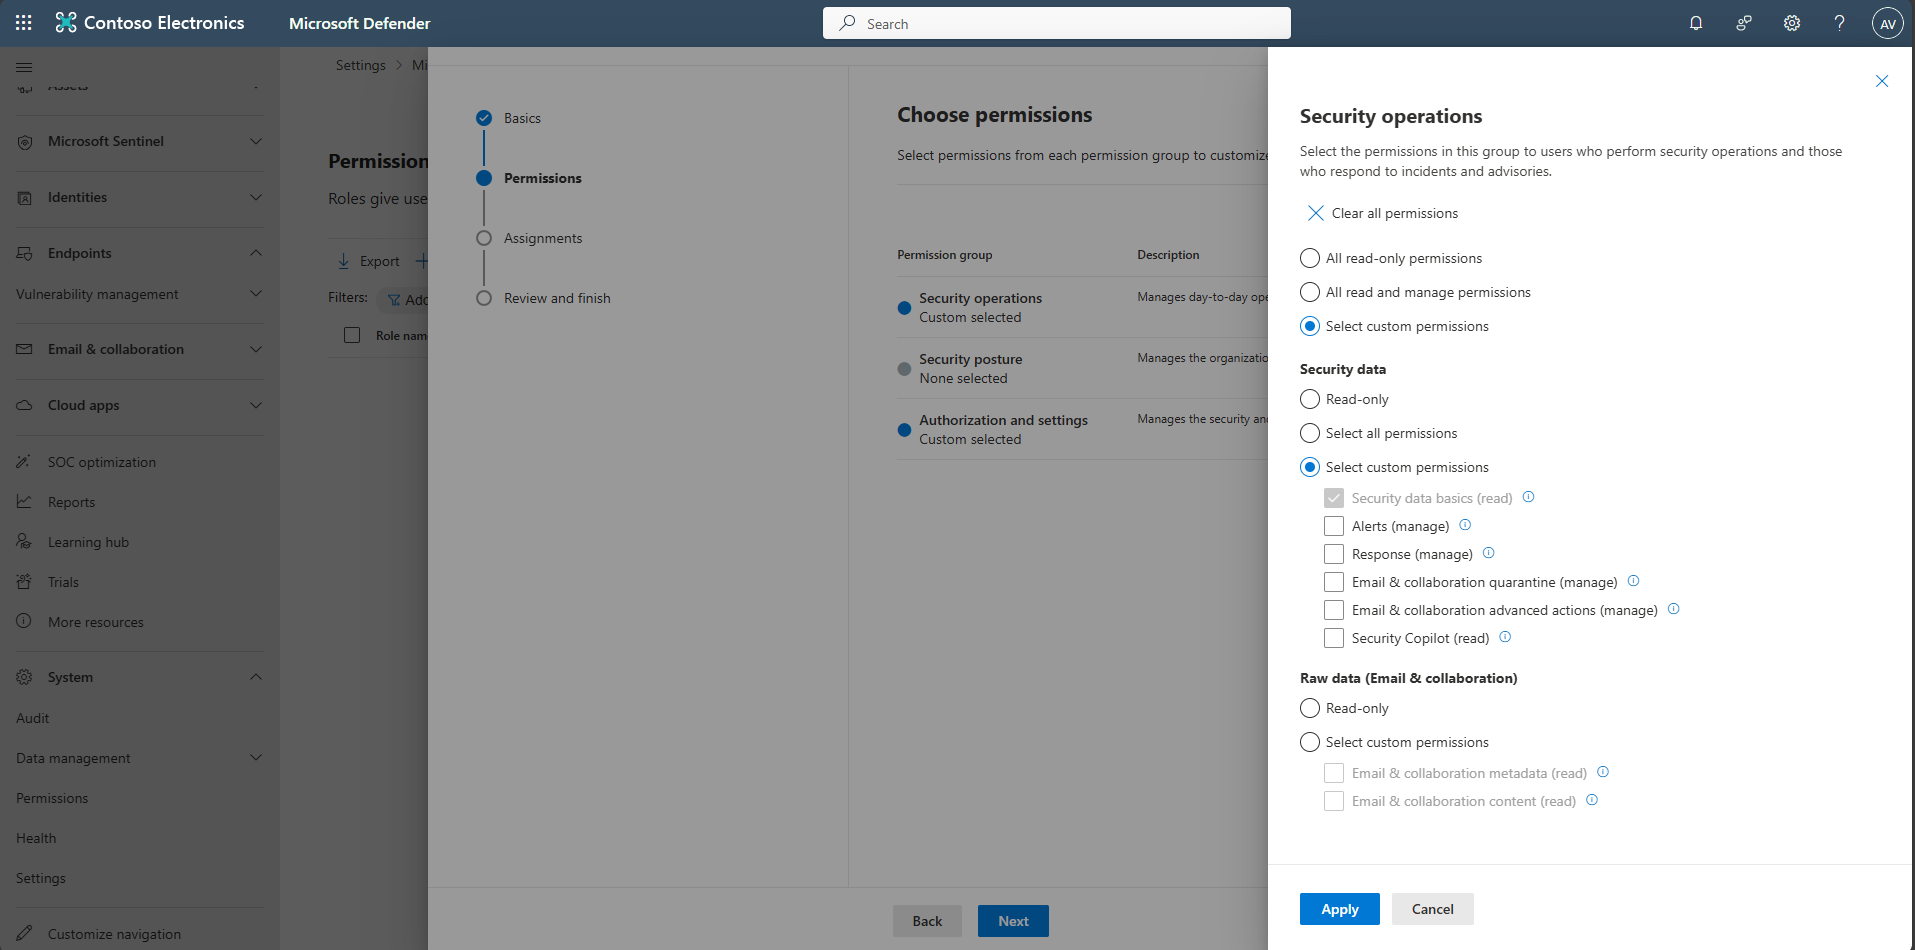
Under Choose permissions, select Security operations.
Notice this automatically added Security data basics (Read).
-
Close the flyout.
-
Select Next to move to the Assignments step.
-
Select Create assignment.
-
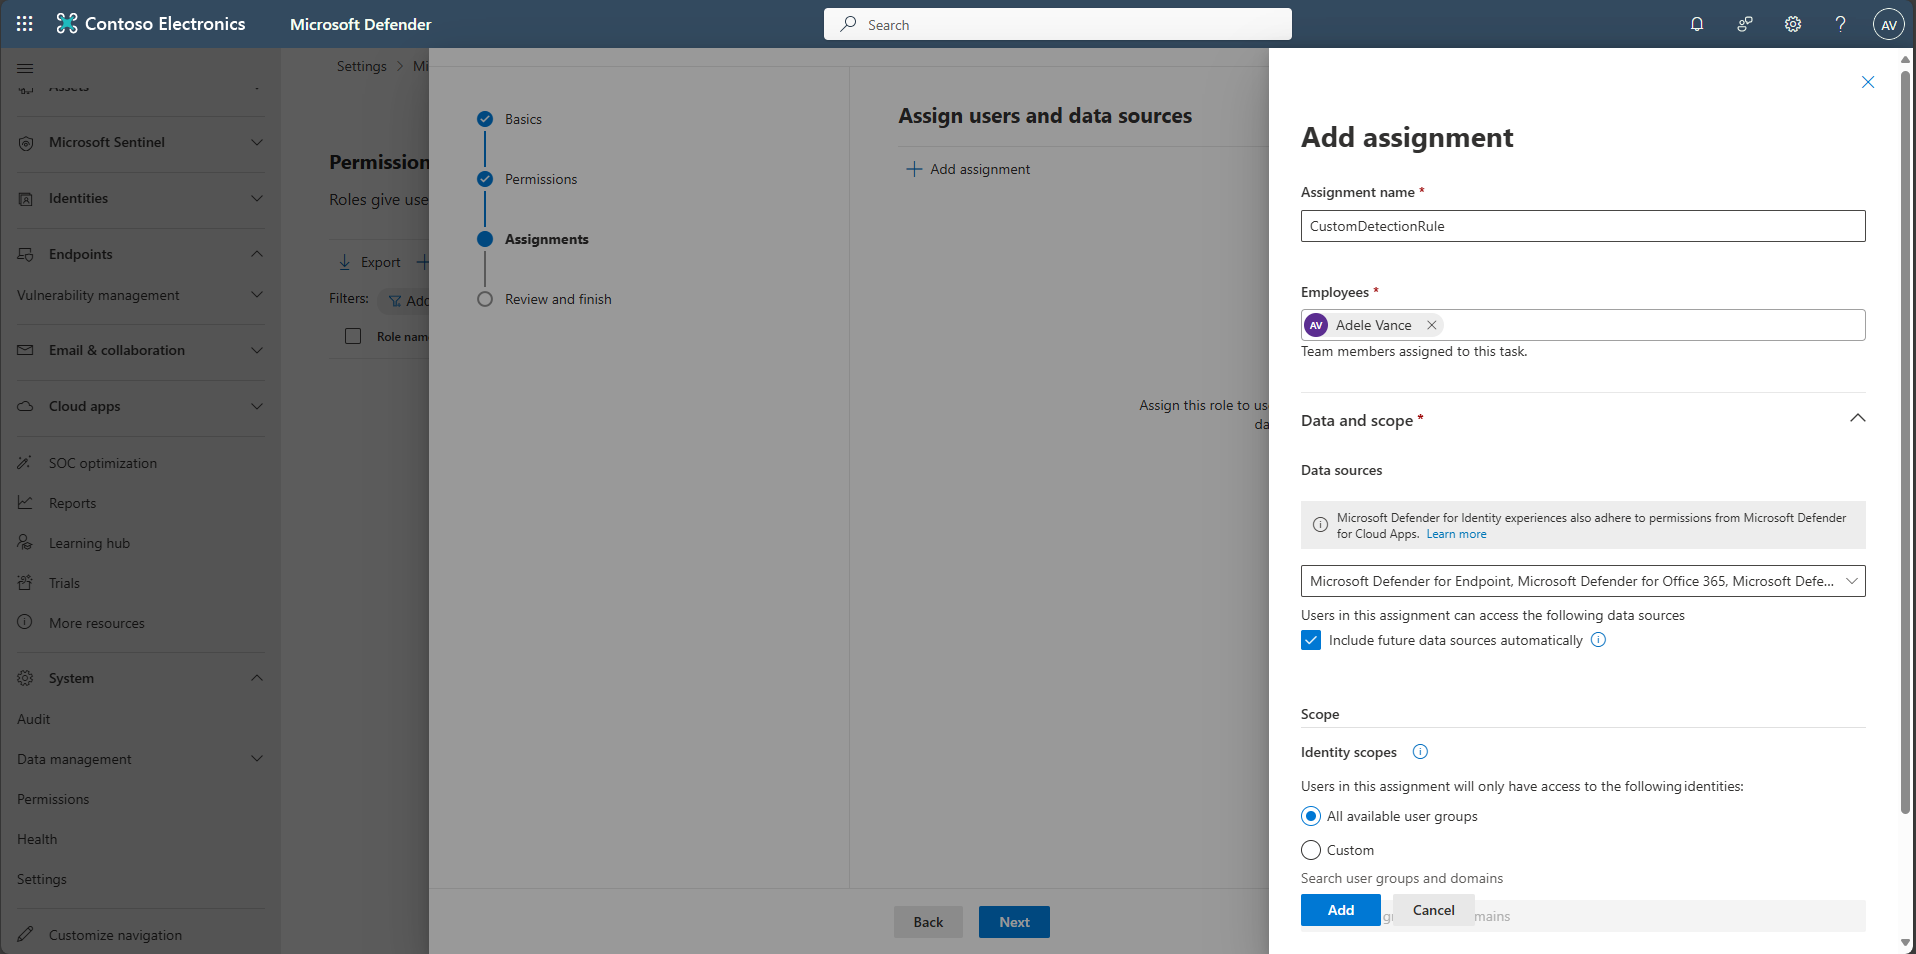
In the flyout pane, under Assignment name, enter +++CustomDetectionRule+++.
-
Under Employees, select any other username in your tenant other than your username. If you don’t have any other users, enter your Azure username.
-
Leave the defaults for Data and scope, then select Add at the bottom of the pane.
-
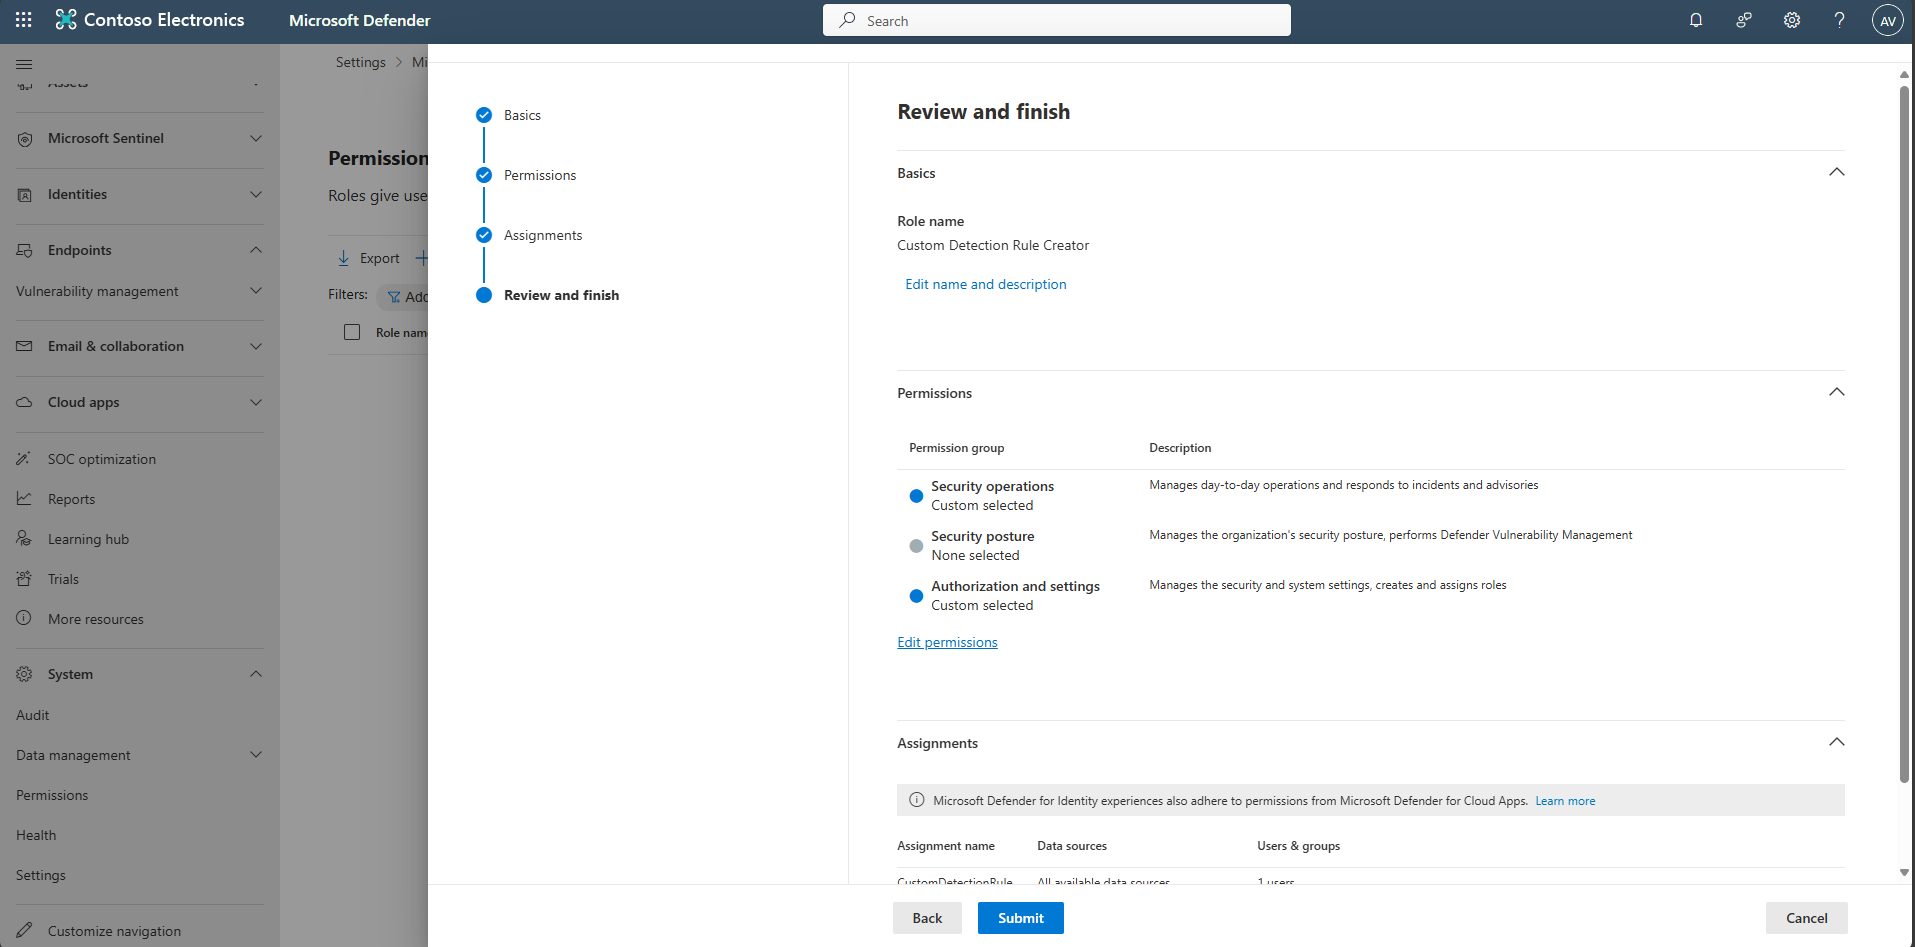
Back on the Assignments step, select Next, then select Submit.
-
Select Done once the role’s been created.
-
Confirm the new role appears in the table.
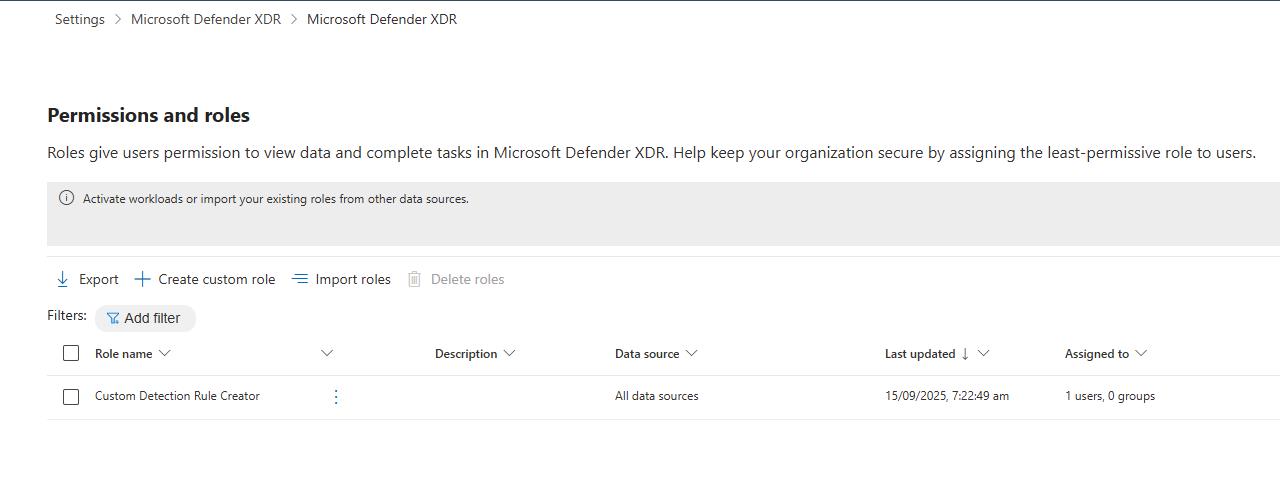
Permissions may take 10-15 minutes to take effect.