TIP
💡 Learn more : App Service Documentation (opens new window).
# Part 3 - An end to end scenario with Azure App Service, API Apps, SQL, VSTS and CI/CD
# A multi-part series showing an end-to-end possibility
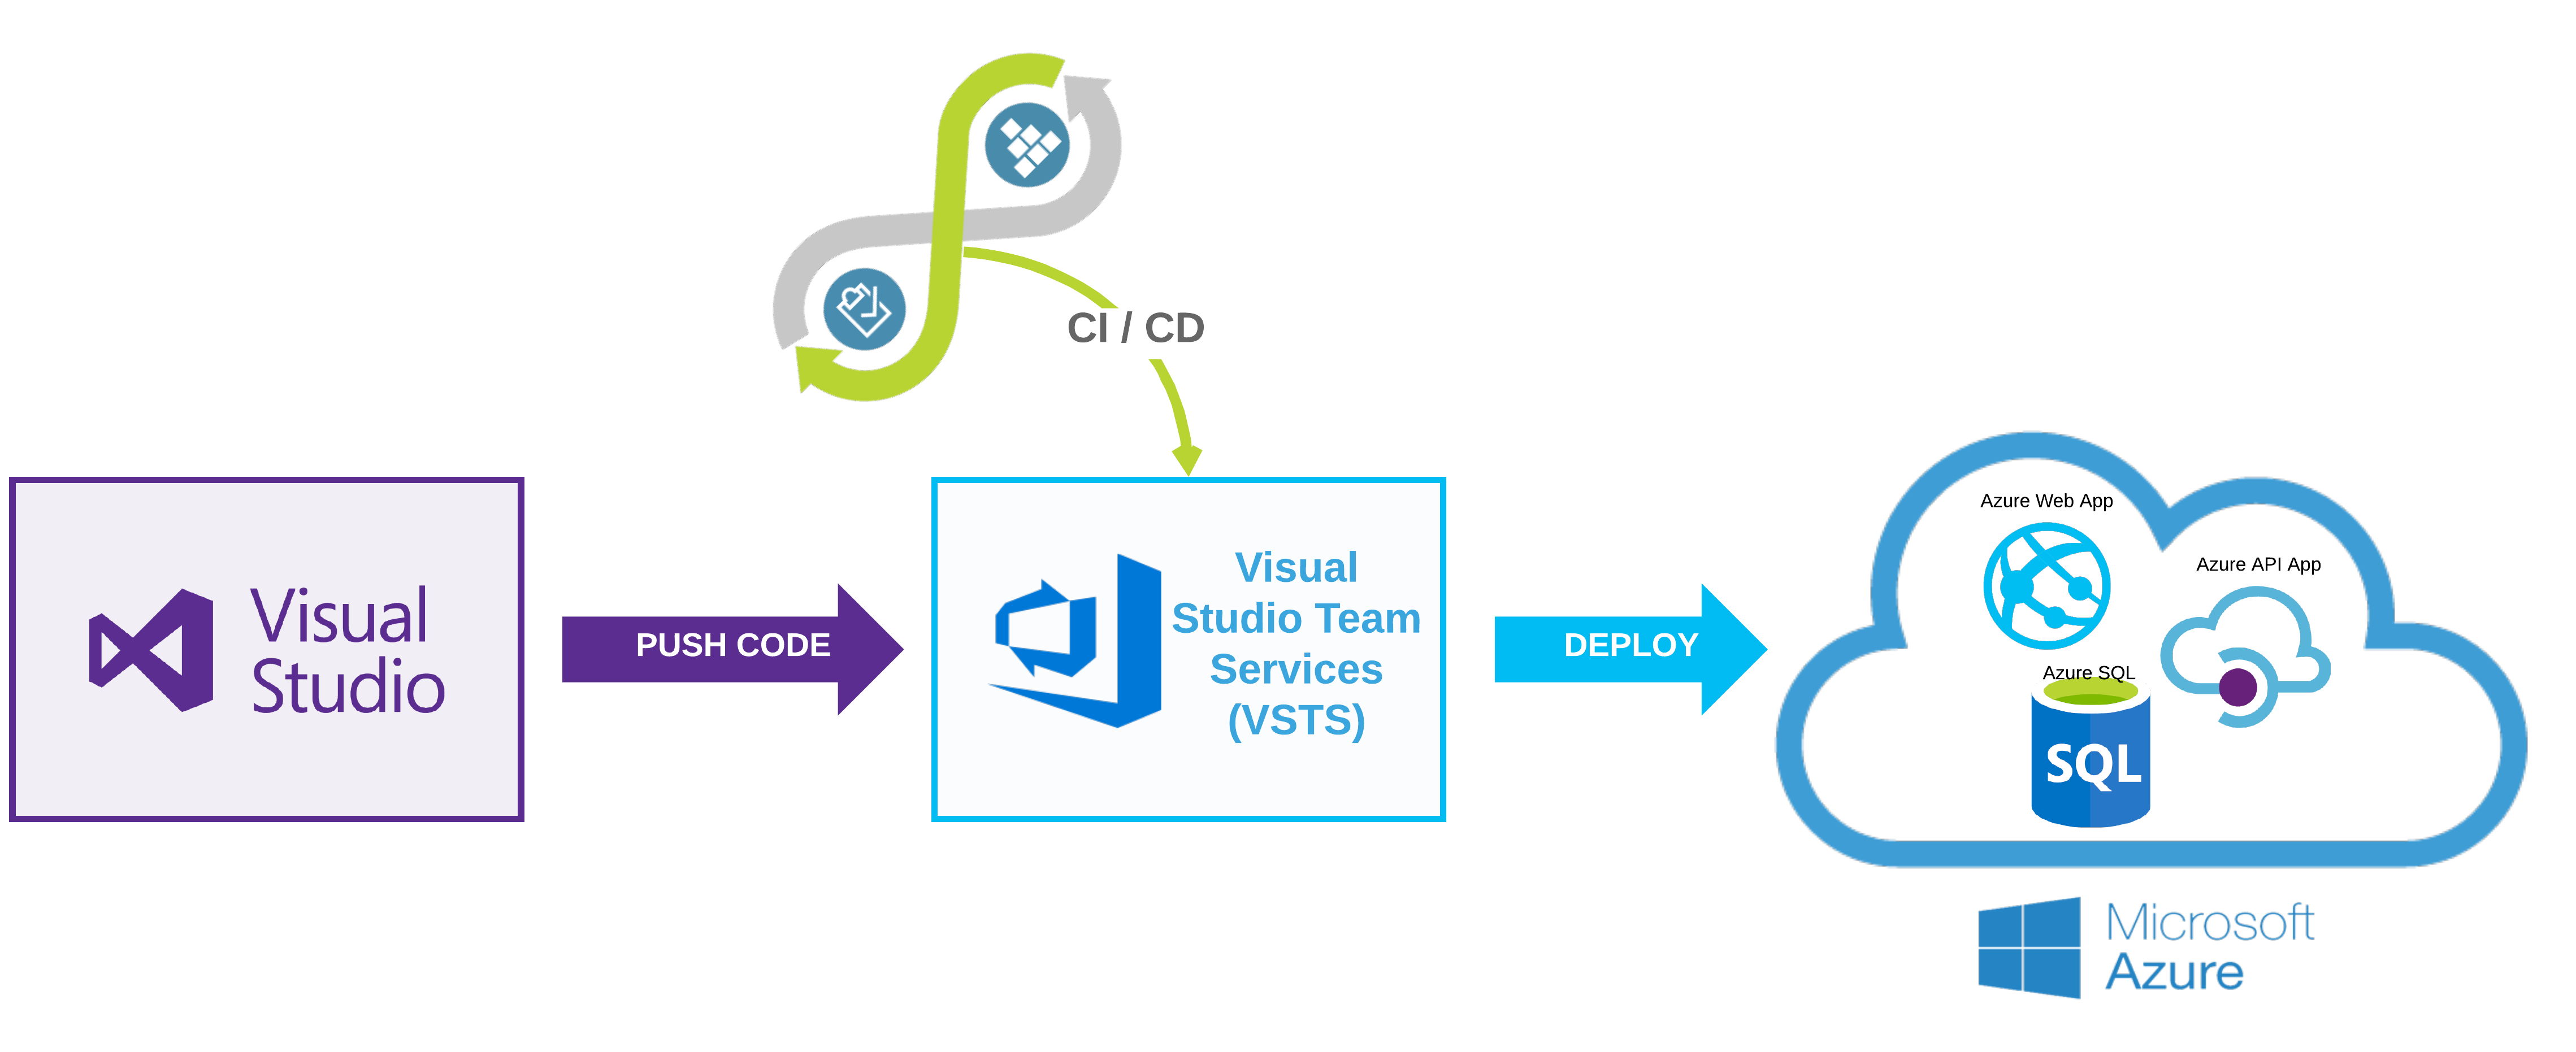
Crystal Tenn (opens new window) and I teamed up to bring an E2E blog series that features an Azure App Service website that communicates with an API project, which communicates to an Azure SQL back-end. The app is a traditional To-Do application based on an existing sample that used ADO.NET, but adapted for Azure deploy and to Visual Studio 2017. The technology/tooling stack is Visual Studio, VSTS, C#, Angular, and SQL.
The process for the app is described below. In Visual Studio, you will start out with a working To Do list application. You will push the code to VSTS (Visual Studio Team Services). Then you will create a CI/CD (Continuous Integration/Continuous Delivery) process in order to deploy to Azure. In Azure you will create 3 resources: Azure Web App, Azure API App, and an Azure SQL Server through this exercise.
- Local Setup - SQL Server (opens new window) - Locally connect a front-end website to an API, and connect the API to a SQL Server.
- Local Setup - Visual Studio and Swagger (opens new window) - Continue Part 1 and use a local instance of Visual Studio and Swagger to communicate to our db.
- Swagger - Learn how to use Swagger for API management (opens new window)
- Azure Deployment - Deploy the SQL database to Azure manually (opens new window)
- Azure Deployment - Deploy the front-end Web App and API App to Azure manually (opens new window)
- Adding the project to VSTS with Git (opens new window)
- VSTS Continuous Integration - Setup a CI Process in VSTS (opens new window)
- VSTS Continuous Deployment - Setup a CD Process in VSTS (opens new window)
- Cleanup - Cleanup and delete the Azure resources created in this tutorial (opens new window)
Keep in mind : While we won't be going into the deep specifics of how to code, you should be able to use this guide to look at several parts of the Azure technology stack and how you can best implement them in your organization.
# Local Setup - Working with Swagger
If you noticed in the last post, we started working with Swagger.
What is Swagger UI? is a collection of HTML, Javascript, and CSS assets that dynamically generate beautiful documentation from a Swagger-compliant API.
The nice thing about Swagger is that you can create an existing Web API app using the VS Templates and add Swagger via Nuget.
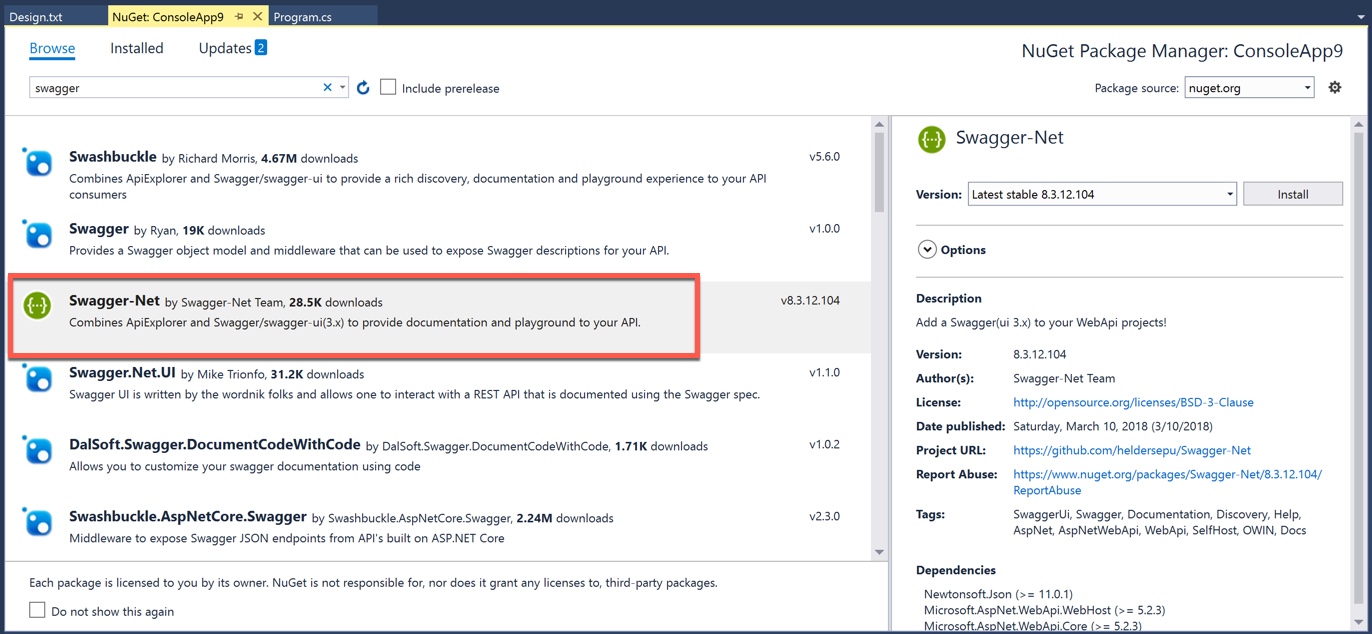
Then if you spin up a project, you simply add /swagger to see the UI. In the example below, we've already added it and supplied the comments in the app to where it recognizes it. This makes testing APIs very simply and it works in real-time, meaning if you run a POST, then you can immediately check your database for the new record.
Learn more about Swagger here (opens new window).
# Continuing where we left off
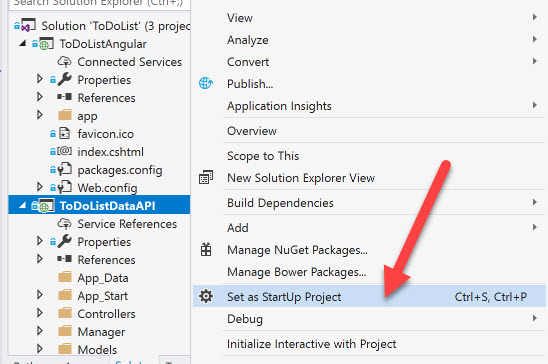
1.) Open the project in Visual Studio by double clicking ToDoList.sln, if it is not already open from the previous parts. Navigate to the ToDoListDataAPI project.
2.) Set the ToDoListDataAPI project to Set as Startup project by right clicking on the project and choosing that option and run the application.
3.) Add "/swagger" to the end of your URL if it is not already there, you should see a page like this:
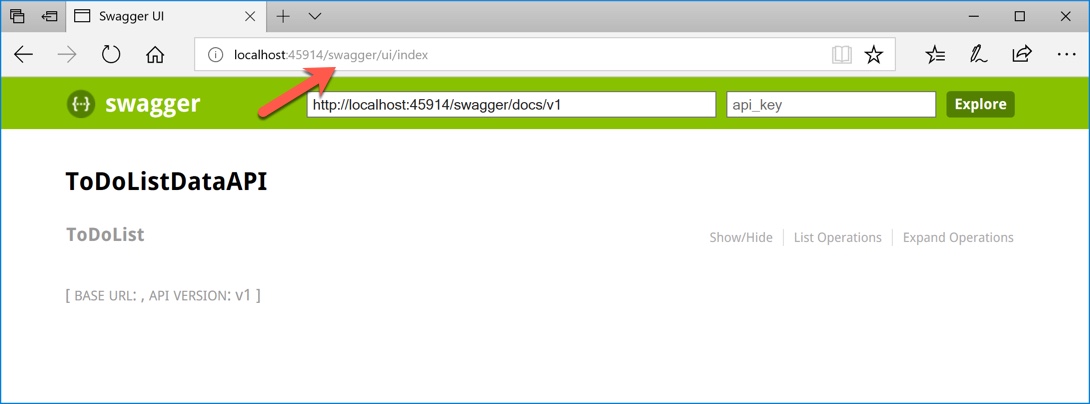
Click on the Show/Hide button.
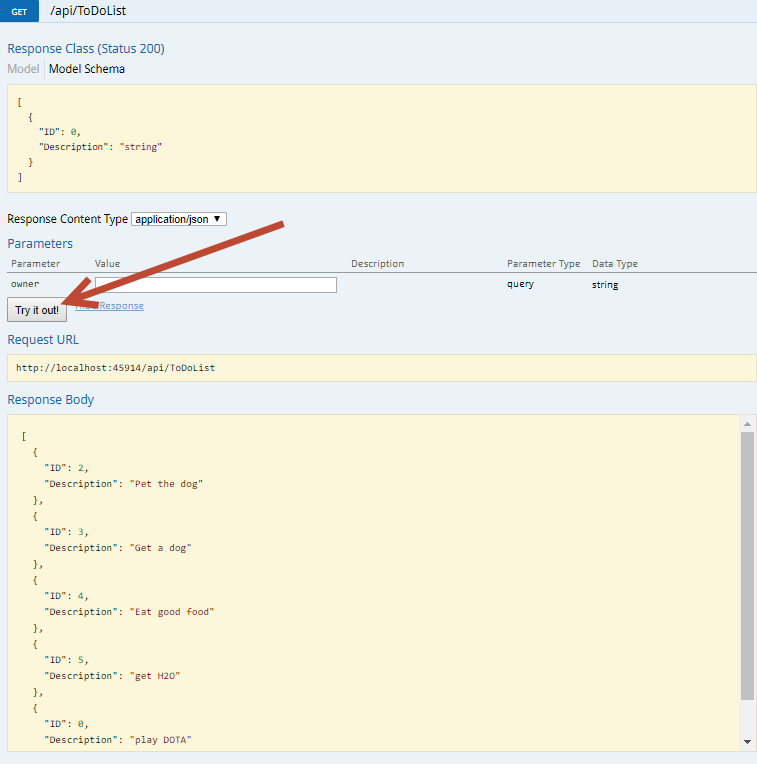
4.) Run a GET which is the first API on the page /api/ToDoList, you should see:
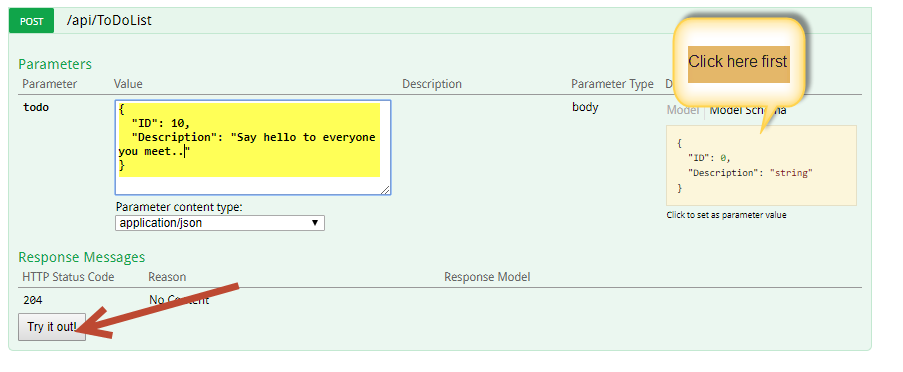
5.) Run a POST, click where the screen-shot shows, and fill in an ID with a random number and any description you want and then click Try it out.
6.) Run a GET again, you should see your added value:
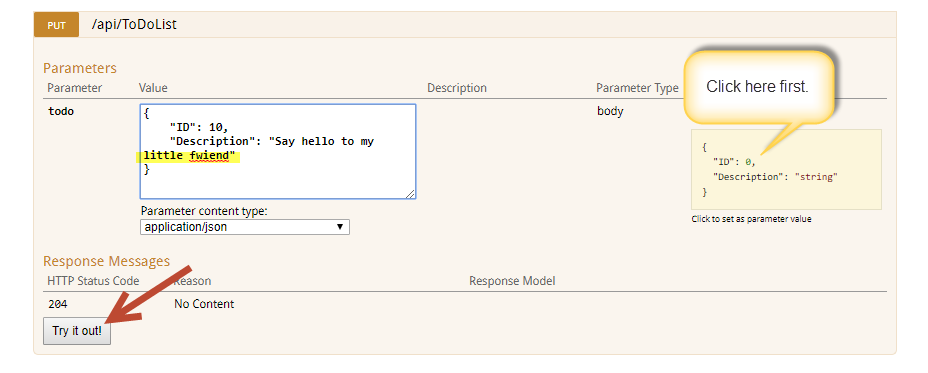
7.) Run a PUT, again click to get the format from where it's shown in the screen-shot and modify an existing record's description.
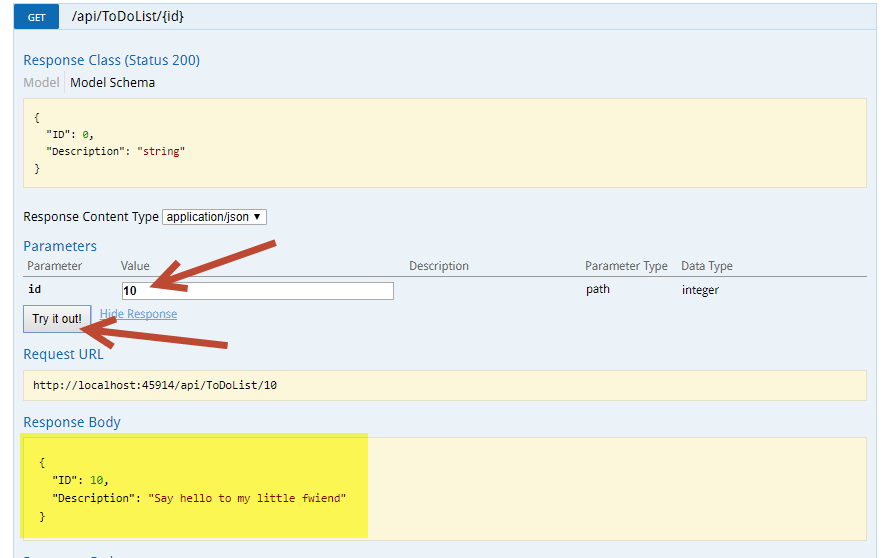
8.) Try to run a GET by ID, use 1 for example:
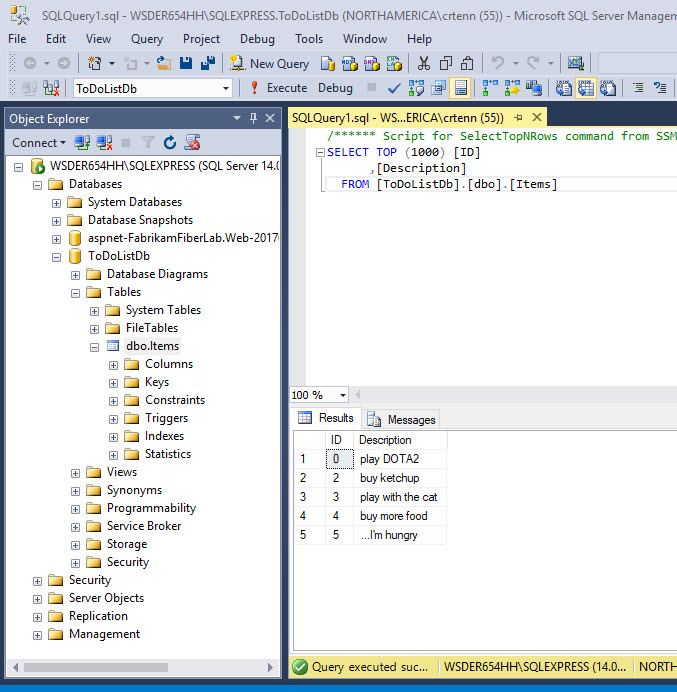
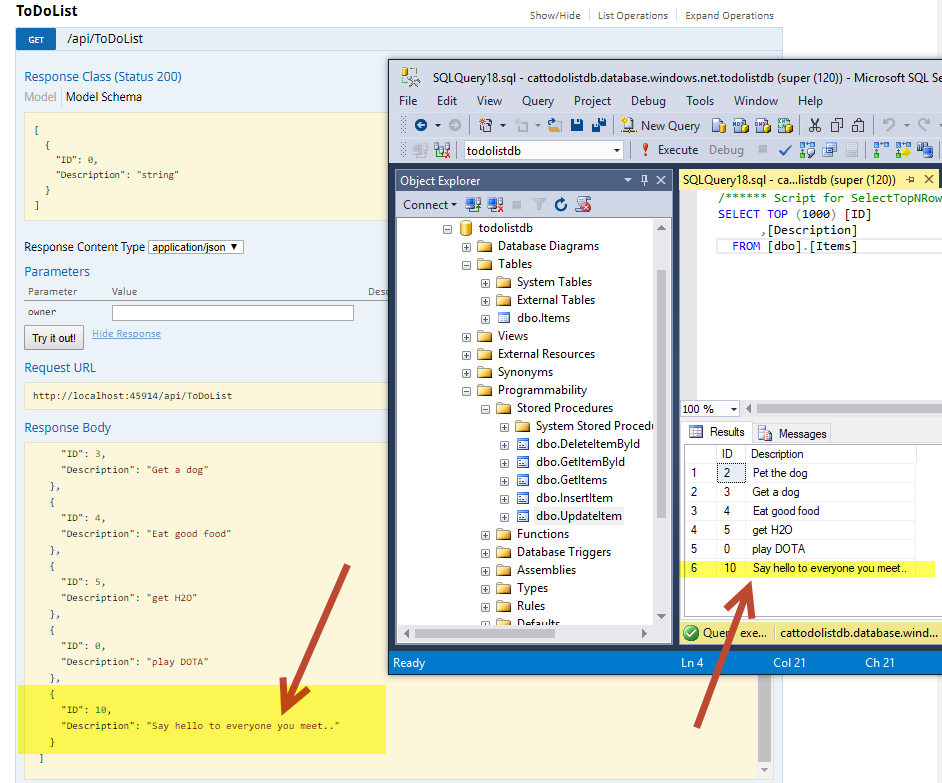
9.) Switch back to SQL Server Management Studio (and log in if you need to) and choose Select Top 1000 Rows on the ToDoListDb db to see the data.
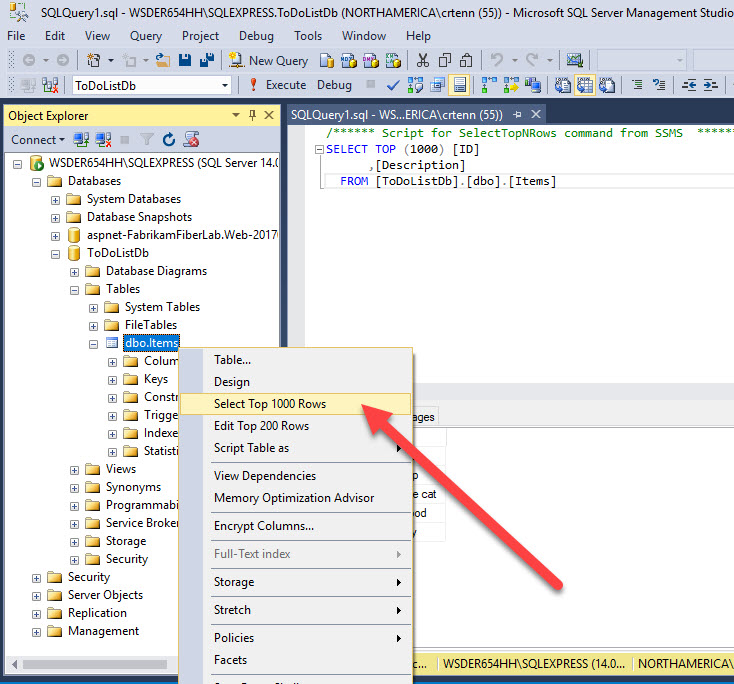
10.) Your SQL Server Management Studio table should look like this now: