
TIP
🔥 Checkout the Azure Developer page at azure.com/developer (opens new window).
💡 Learn more : about Azure Static Web Apps (opens new window).
📺 Watch the video : How to build Blazor and C# APIs in Azure Static Web Apps (opens new window).
# How to build Blazor and C# APIs in Azure Static Web Apps
# Static websites and Functions
Static websites consist out of static files, like HTML, CSS, JavaScript files and images and videos. These static files don't change, which is why you do not need a server to render HTML to display the website. Your browser just downloads the static files and displays them. This makes static websites extremely fast. Azure Static Web Apps (opens new window) can host static websites and automatically distribute the static files globally, so that users around the world will have a very fast experience.
To add more functionality to static websites, you can call APIs from them to retrieve and manipulate data. With Azure Static Web Apps, you get API functionality out-of-the-box, without needing a server. The Static Web App hosts APIs in Azure Functions (opens new window), that run only when you need them and scale automatically. This makes the experience of creating and running a static website in Azure Static Web Apps extremely easy, as you'll see in this post.
# Prerequisites
If you want to follow along, you'll need the following:
- An Azure subscription (If you don't have an Azure subscription, create a free account (opens new window) before you begin)
- A GitHub account (opens new window)
# Build and deploy a Blazor WebAssembly website with C# APIs
We will use a code sample from GitHub that contains a Blazor WebAssembly application for a shopping list. The application works with an API that is also included in the code, in the form of Azure Function projects. We'll create a new repository in GitHub from the GitHub template that contains the sample code, and use it as our basis to deploy to an Azure Static Web App.
- Go to https://github.com/MicrosoftDocs/mslearn-staticwebapp-dotnet/generate (opens new window)
- If you get a 404 error, sign into your GitHub account and try again
- Fill in a name for the repository
- Select Create repository from template
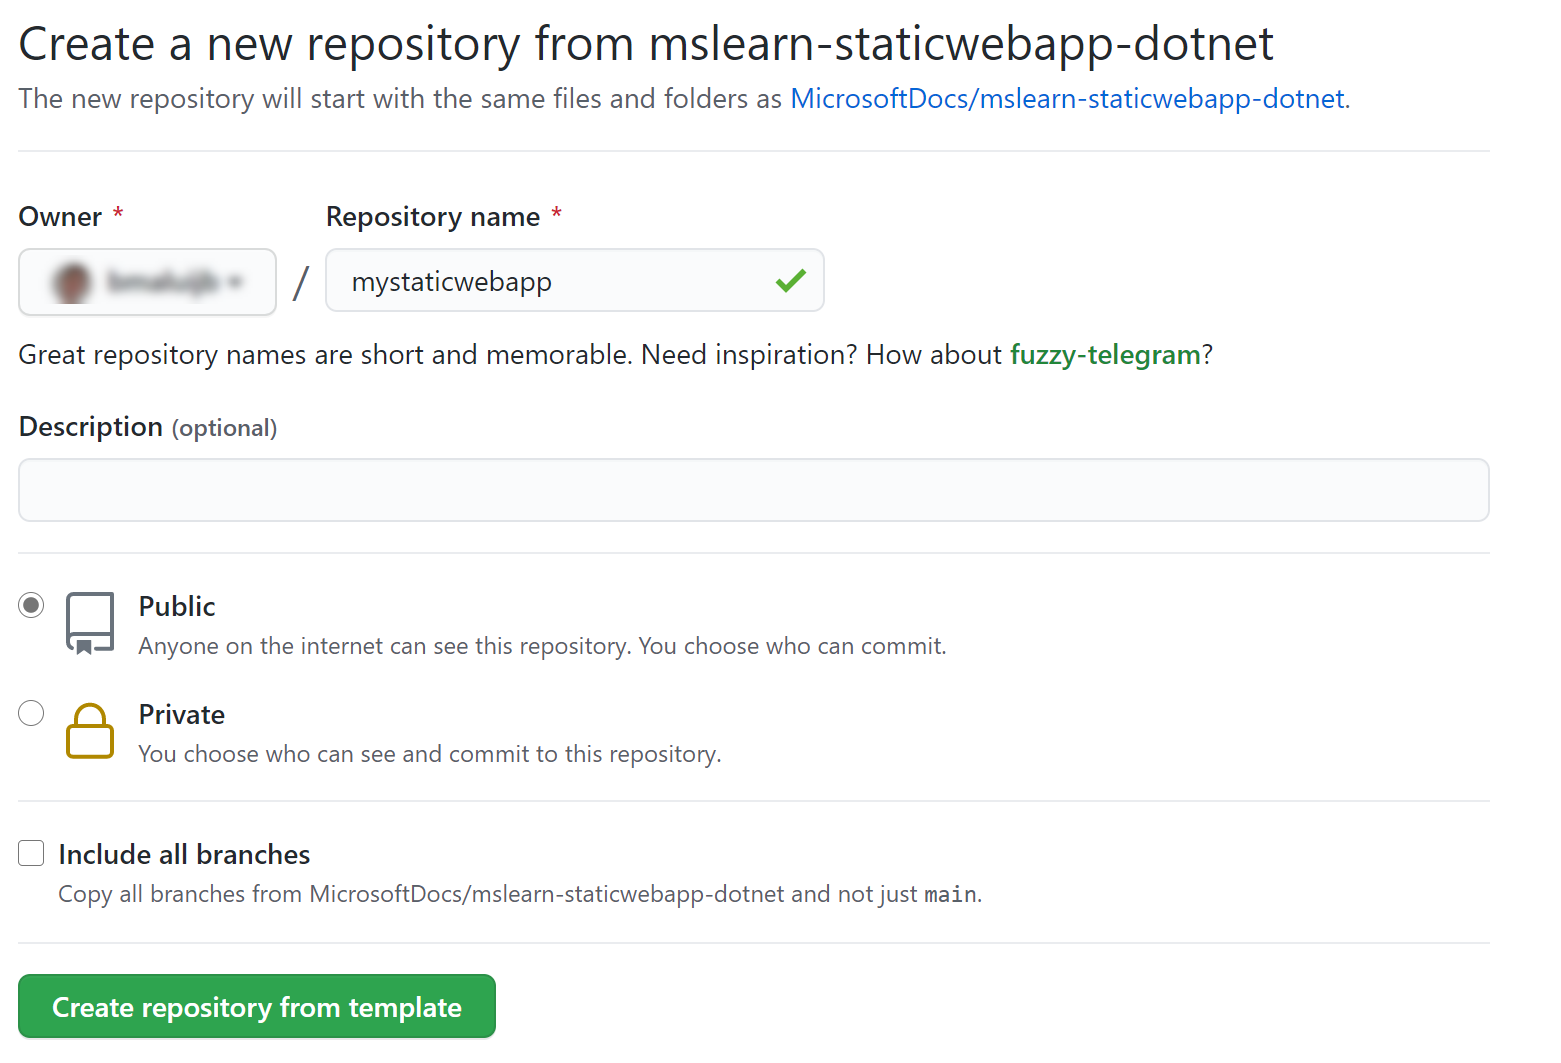
(Create GitHub repository from template)
Now that we have the code, we need to add to it. The code contains APIs in the Api folder. However, it only contains APIs to Put, Post and Delete data. We need to add an API that can retrieve data.
- In GitHub, navigate to the newly created repository with the sample code
- Select Code > Open with Codespaces > New codespace. This will create a new GitHub Codespace (opens new window) which is a web-based development environment, based on VS Code
- When the GitHub Codespace is loaded, navigate to the Api folder in the code
- Create a new file in the Api folder and call it ProductsGet.cs. This will be the Azure Function which acts as an API to retrieve shopping list data
- Change the code in ProductsGet.cs to the following:
using System.Threading.Tasks;
using Microsoft.AspNetCore.Mvc;
using Microsoft.Azure.WebJobs;
using Microsoft.Azure.WebJobs.Extensions.Http;
using Microsoft.AspNetCore.Http;

namespace Api
{
    public class ProductsGet
    {
        private readonly IProductData productData;

        public ProductsGet(IProductData productData)
        {
            this.productData = productData;
        }

        [FunctionName("ProductsGet")]
        public async Task<IActionResult> Run(
            [HttpTrigger(AuthorizationLevel.Anonymous, "get", Route = "products")] HttpRequest req)
        {
            var products = await productData.GetProducts();
            return new OkObjectResult(products);
        }
    }
}
2
3
4
5
6
7
8
9
10
11
12
13
14
15
16
17
18
19
20
21
22
23
24
25
26
- in the GitHub Codespace, navigate to the Source Control menu
- Commit the change that you've just made by clicking on the checkmark icon
- Click on ... next to the checkmark icon and select Push to push the code change to GitHub
That's it. We have a complete Blazor WebAssembly application with Azure Functions APIs in GitHub. Next, we'll deploy it to an Azure Static Web App.
- Go to the Azure portal (opens new window)
- Click the Create a resource button (the plus-sign in the top left corner)
- Search for static web app, select the "Azure Static Web App" result and click Create
- This brings you to the Create Static Web App blade
- Select a Resource Group
- Fill in a Name for the web app
- Select a Region
- Leave the Source to GitHub and click on Sign in with GitHub
- Authorize Azure to use GitHub
- Next, select your GitHub organization
- And select the Repository that contains the code of the sample application
- Select main for Branch
- In Build Presets, select Blazor. This will show locations for the application client, API and output. Leave the defaults as they are
- Click Review + create and Create after that to create the Azure Static Web App.
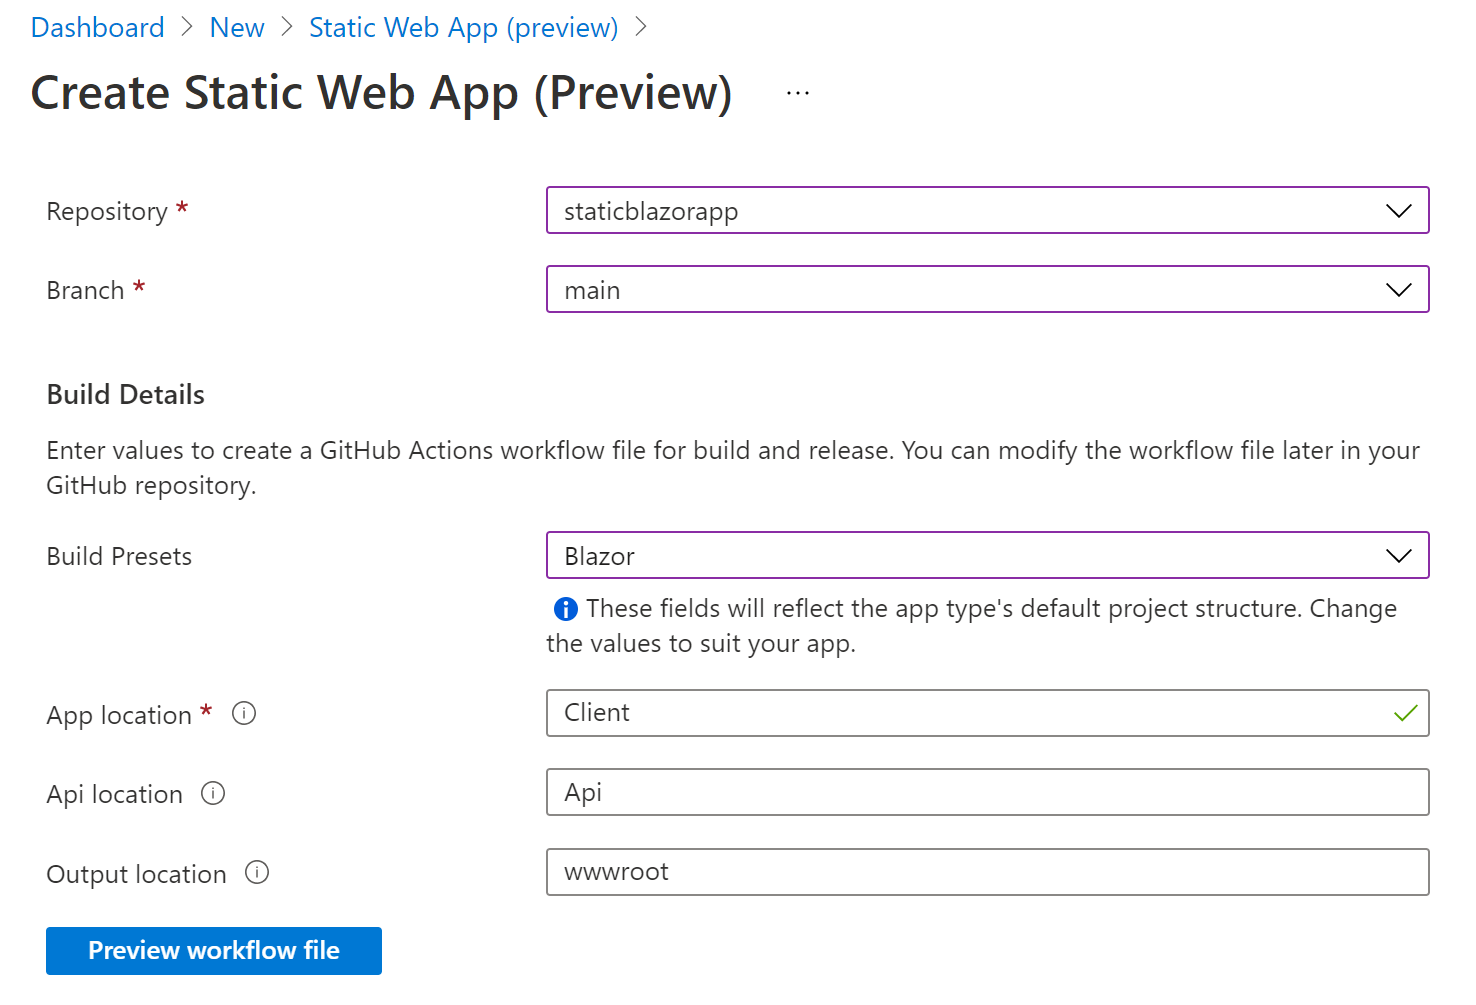
(Create Azure Static Web App in the Azure portal)
When you create an Azure Static Web App, you automatically create a GitHub Action (opens new window) that compiles and deploys code from GitHub to the Static Web App. The GitHub Action takes the code and creates static files from it.
- When the Azure Static Web App is created, navigate to it in the Azure portal
- It will show a message that it doesn't have any content yet, and that it is waiting for a GitHub Action to complete.Click on the message to navigate to the GitHub Action
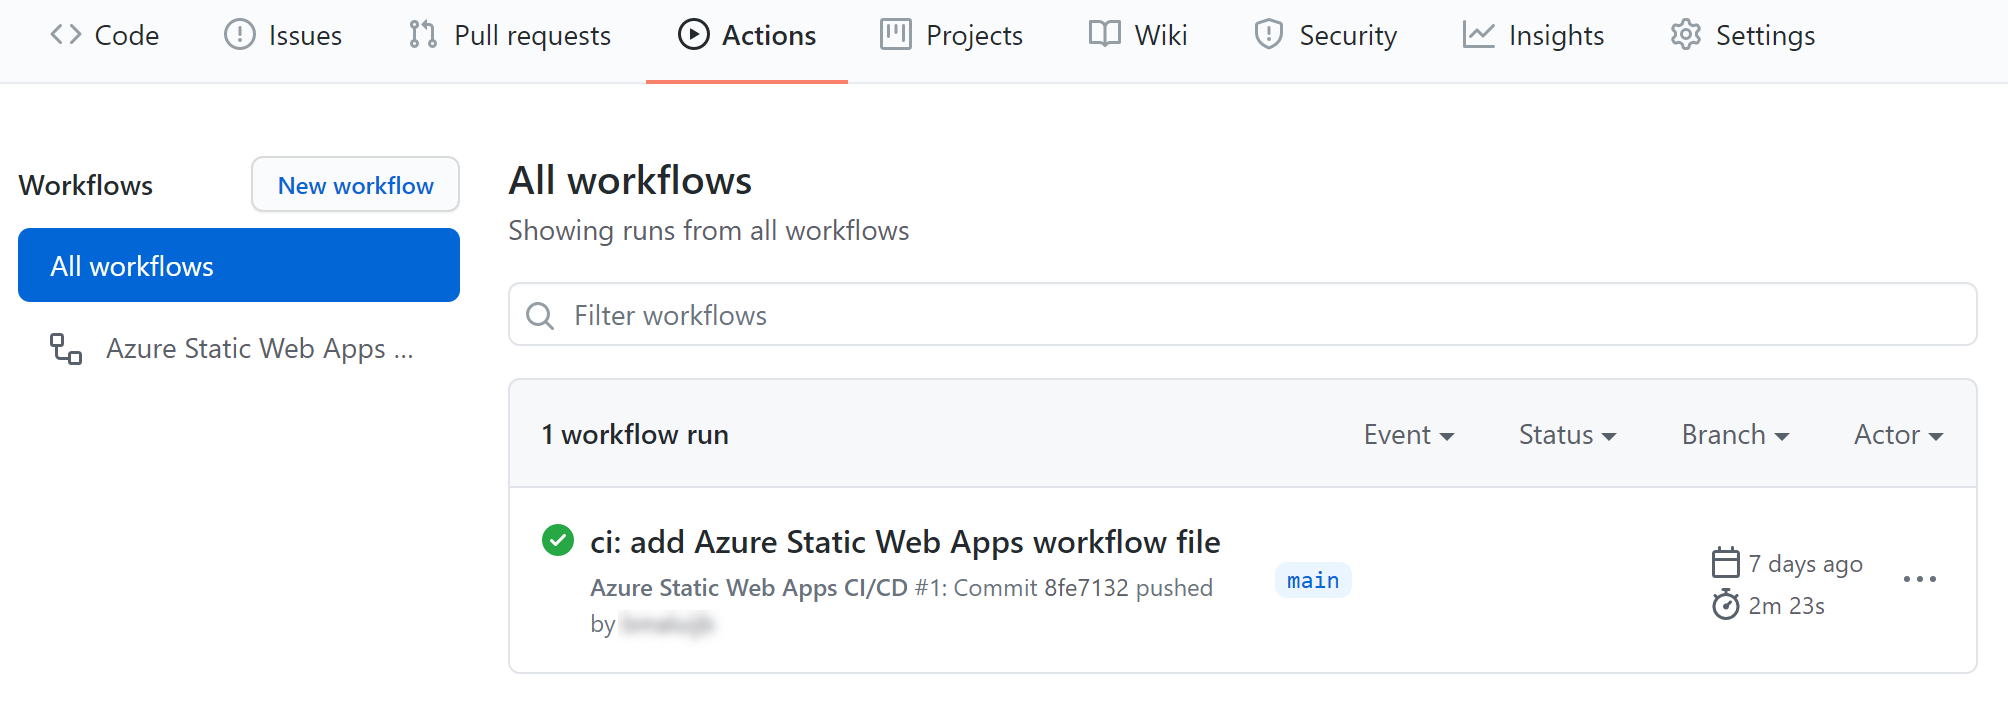
(GitHub Action that completed compiling code and deploying it to the Azure Static Web App)
Once the GitHub Action is done, you can use the static website. In the Azure portal, in the overview of the Azure Static Web App, click on the URL to navigate to the static website. It will open and load data from the API that we've created.
(The static Blazor website, running in an Azure Static Web App)
# Conclusion
Azure Static Web Apps (opens new window) are simple to use and can host very fast, static websites. On top of that, Azure Static Web Apps run APIs in Azure Functions (opens new window), without you having to create or manage them. The website and APIs work together seamlessly and are configured for you, so that you can focus on the code. Go check it out!