TIP
🔥 Help shape the future of Azure Tips and Tricks by telling what you'd like us to write about here (opens new window).
💡 Learn more : Azure App Service overview (opens new window).
📺 Watch the video : How to automatically scale Azure App Services (opens new window).
# How to automatically scale Azure App Services
# The elastic cloud
Sometimes a lot of users visit your applications, and sometimes, it's not busy. You want your application to stay up and running in both scenarios. The cloud offers elastic capabilities that make this possible. When a lot of users visit your application, you can automatically scale your application to meet those needs. And when it isn't busy, your applications can scale back to minimize costs. Azure App Service Web Apps (opens new window) can do exactly that with autoscaling.
In this post, we'll configure an Azure App Service Web App (opens new window) to automatically scale out and in.
# Prerequisites
If you want to follow along, you'll need the following:
- An Azure subscription (If you don't have an Azure subscription, create a free account (opens new window) before you begin)
- An existing Azure App Service Web App with an application running in it. Learn how to create one in this quickstart (opens new window). Make sure that it is running on an App Service plan of the S family or higher. This is required to use autoscaling
# Scaling a Web App out and in
Scaling up and down means that you increase or decrease the processing capacity of your infrastructure. In the case of an Azure App Service Web App, scaling up would mean choosing a more powerful App Service plan (opens new window). Scaling out and in means that you increase or decrease the amount of instances that run your application. For a Web App, that means scaling the amount of Web App instances up or down.
Let's configure a Web App to automatically scale out and in, based on a metric.
- Go to the Azure portal (opens new window) and navigate to the existing Web App
- Navigate to the Scale out (App Service plan) menu
- You can scale the amount of Web App instances that run in the App Service plan. Multiple instances will all share the computing power of the same App Service plan. You can scale the instance count manually, or automatically
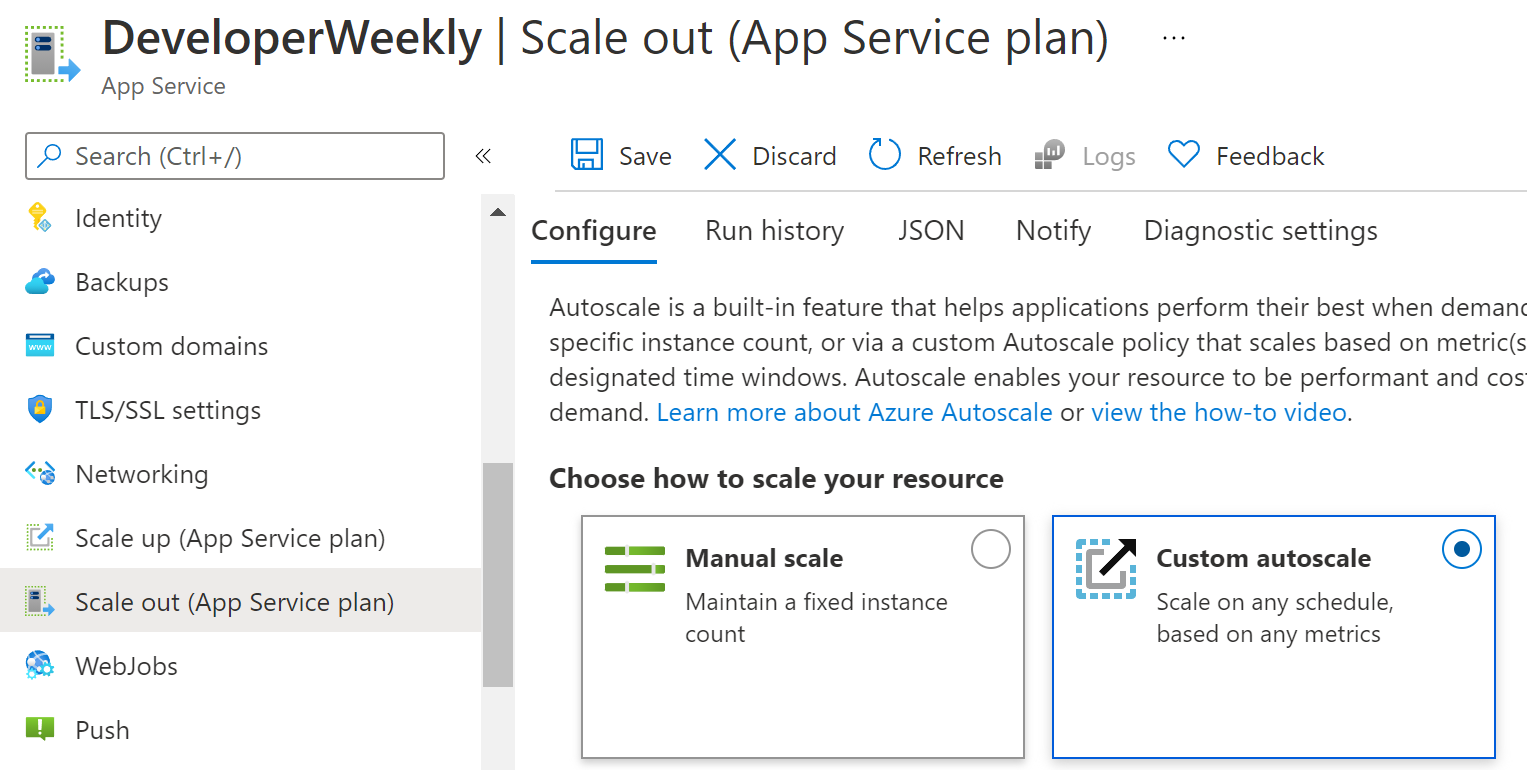
(Scale the number of instances)
- Click on Custom autoscale. You'll now see the first scale condition. You can add and remove conditions that dictate how the autoscaling works
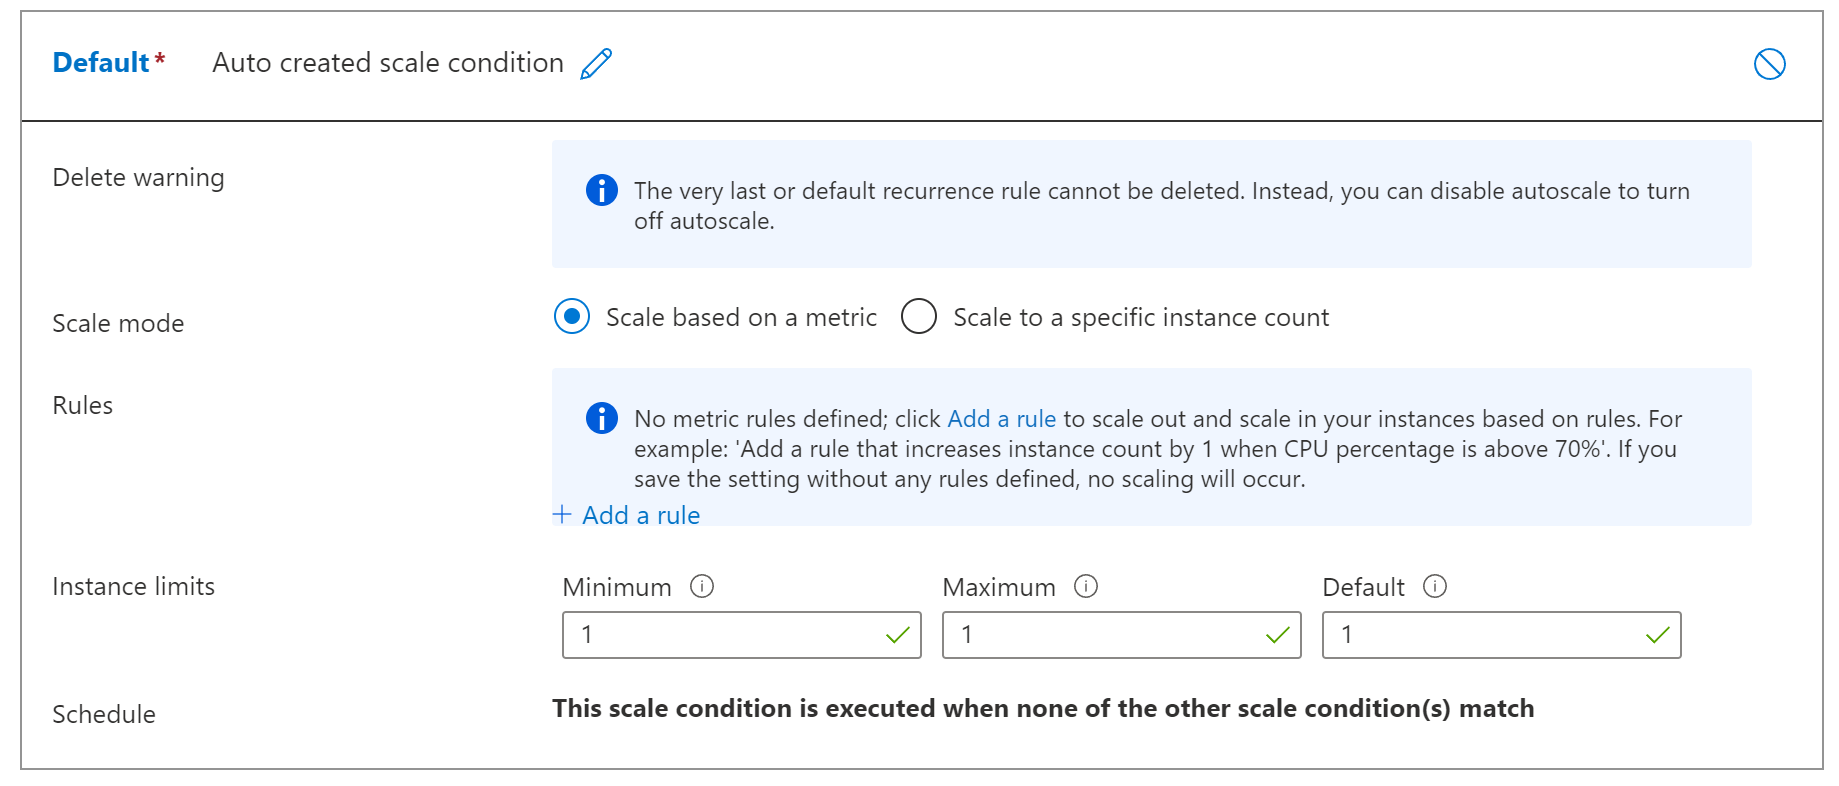
(Autoscale condition)
- Let's configure the first condition. We will scale based on a metric. Click the "Add a rule" link
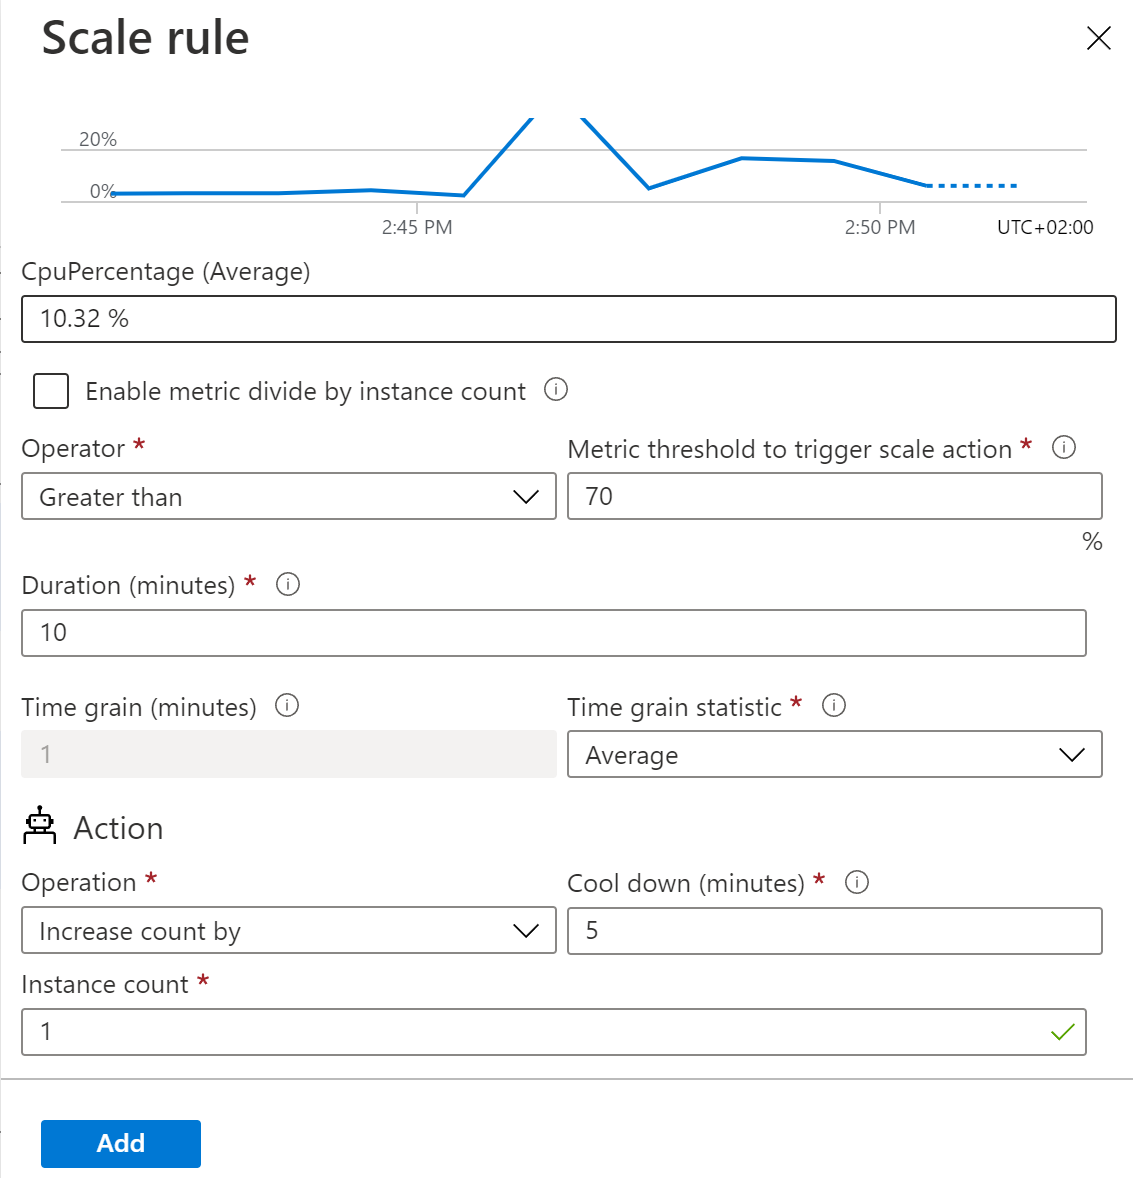
(Add an autoscale rule)
- Pick a Metric name. This is the metric that we will base the rule on. For instance, pick CPU Percentage. When you select a metric, you'll see the graph of the metric value for the last 10 minutes
- Next, fill in the "Metric threshold to trigger scale action". For CPU percentage, this could be 70. With the default settings, this means that if the average CPU percentage of the Web App was greater than 70 percent for 10 minutes, a scale action is triggered. You can change this rule by changing the Operator, Duration, and Time grain statistic, that determine how the metric is evaluated
- Next, enter the Instance count that you want the Web App to scale with. Leave the Operation to "Increase count by", and the "Cool down" to 5. This means that the Web App will increase its number of instances by 3 when it scales, and that it will not execute this scale action again for 5 minutes (the cool down period)
- Click Add to add the rule. You can add more rules to the scale condition, and we will leave it to just this one
- In the condition, you can set the "Instance limits". This is the minimum, maximum, and default number of instances the Web App should have
- Add another condition by clicking on the "Add a scale condition"
- Select "Scale to a specific instance count"
- Enter a "Start date" and time and an "End date" and time. For instance, start at the end of Friday, and end at the beginning of Monday. You can use this to scale in or out at certain times, like to scale in to save costs over the weekend when there are less users
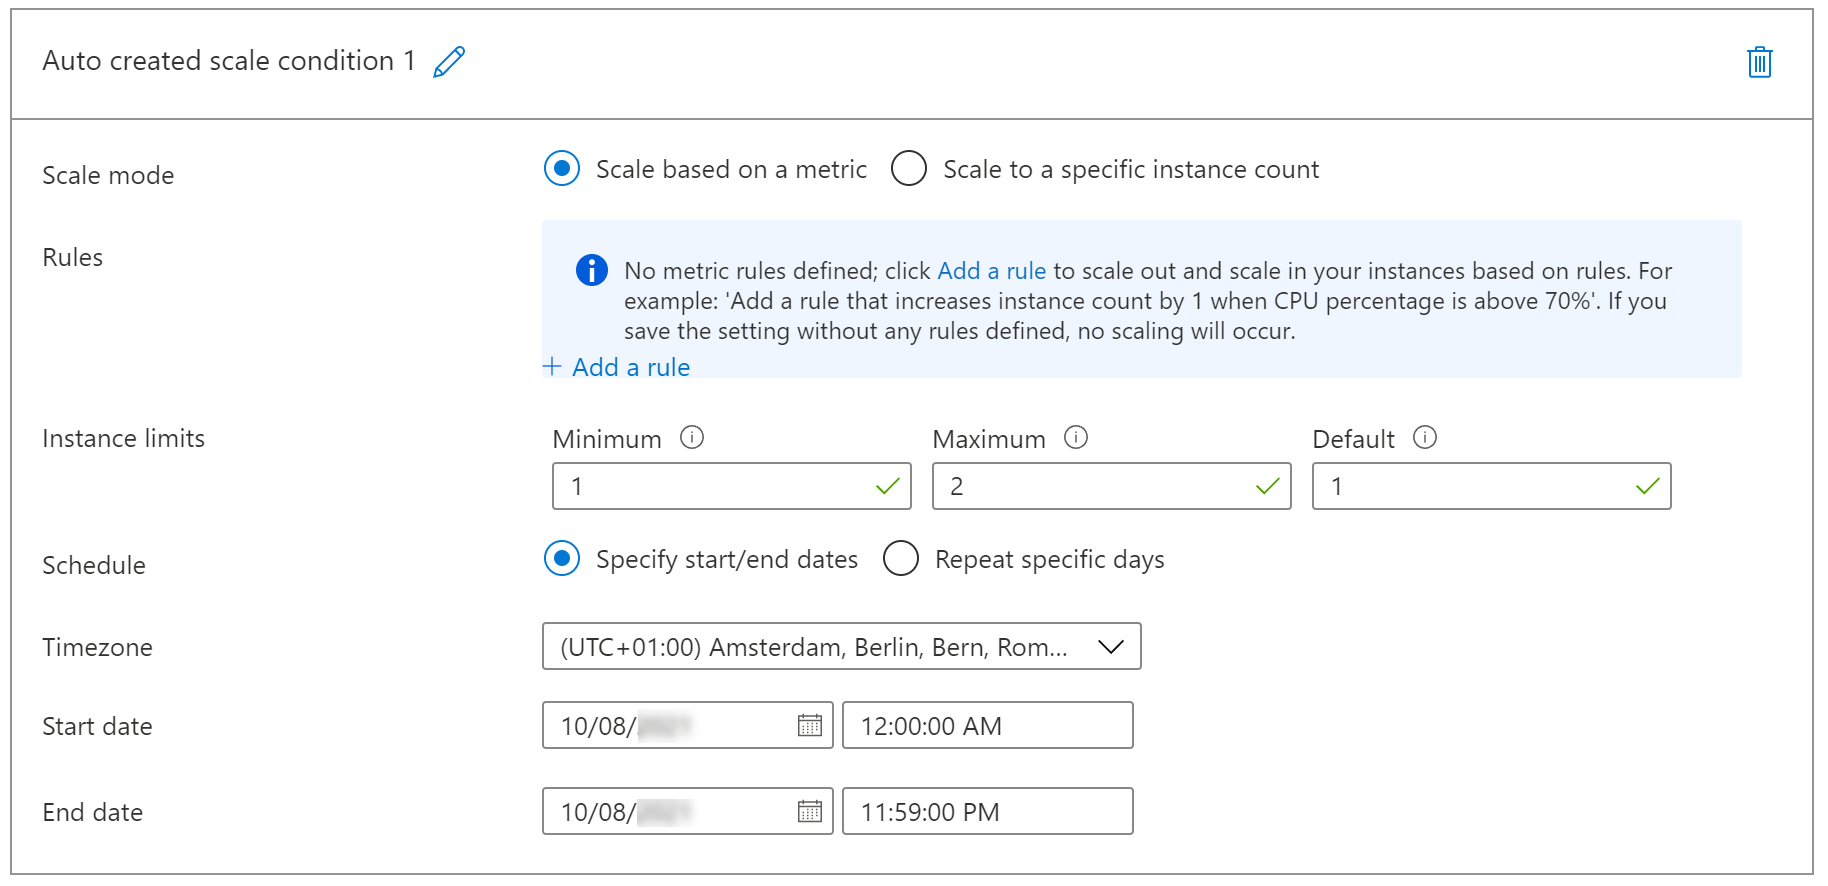
(Scale based on a schedule)
- Click Save to save the scale conditions
- Use the web application until it scales. When you go back to the Scale out menu, you can see the scale actions in the "Run history" tab
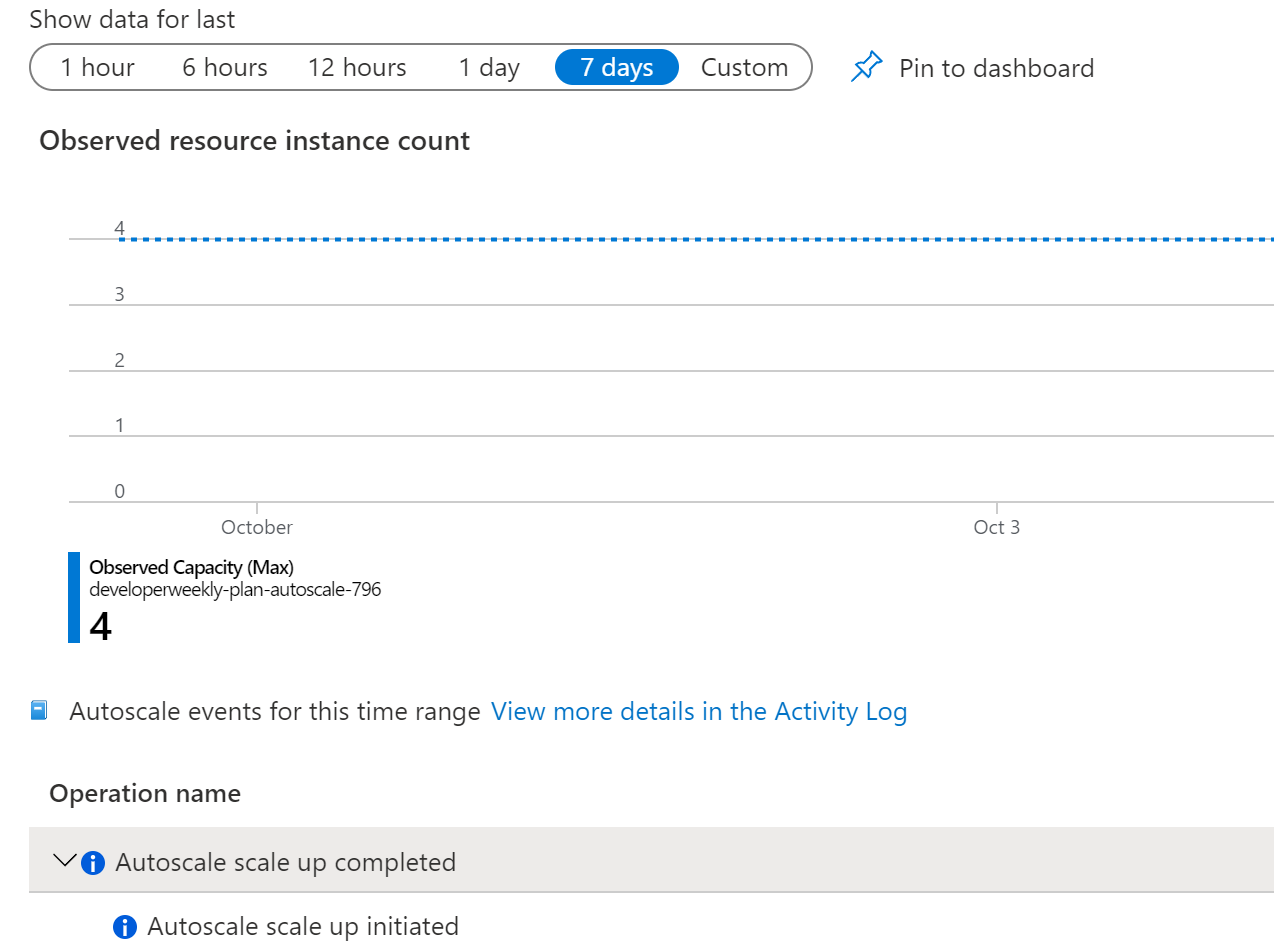
(The scale action history)
# Conclusion
Autoscaling (opens new window) is a powerful feature of Azure App Service (opens new window), that enables you to keep serving users when it is busy, and save money when it's not. Go and check it out!
