
TIP
💡 Learn more : Azure API Management (opens new window).
📺 Watch the video : How to get started with Azure API Management (opens new window).
# Getting started with Azure API Management
When you are developing APIs that other people use, you should seriously consider using Azure API Management (opens new window). This service acts as a gatekeeper in front of your API and adds many features, like:
- Securing your API, including setting quotas and request throttling
- A developer portal for people that use your API, which includes documentation and security key management
- Self-service subscriptions for API users
- Transform the external appearance of your API calls
- See who used your API and how much they used it
Let's explore how you can get started with Azure API Management.
# Creating an Azure API Management instance and importing an API
We'll start by creating a new Azure API Management instance and putting it in front of an API.
- In the Azure portal, click the "Add a resource" button (the green plus sign in the top-left corner) and search for API Management
- Click on the API Management search result and click Create
- This opens up the API Management Creation blade. Fill out all of the information and pick a pricing tier. The Development tier is fine for this tutorial
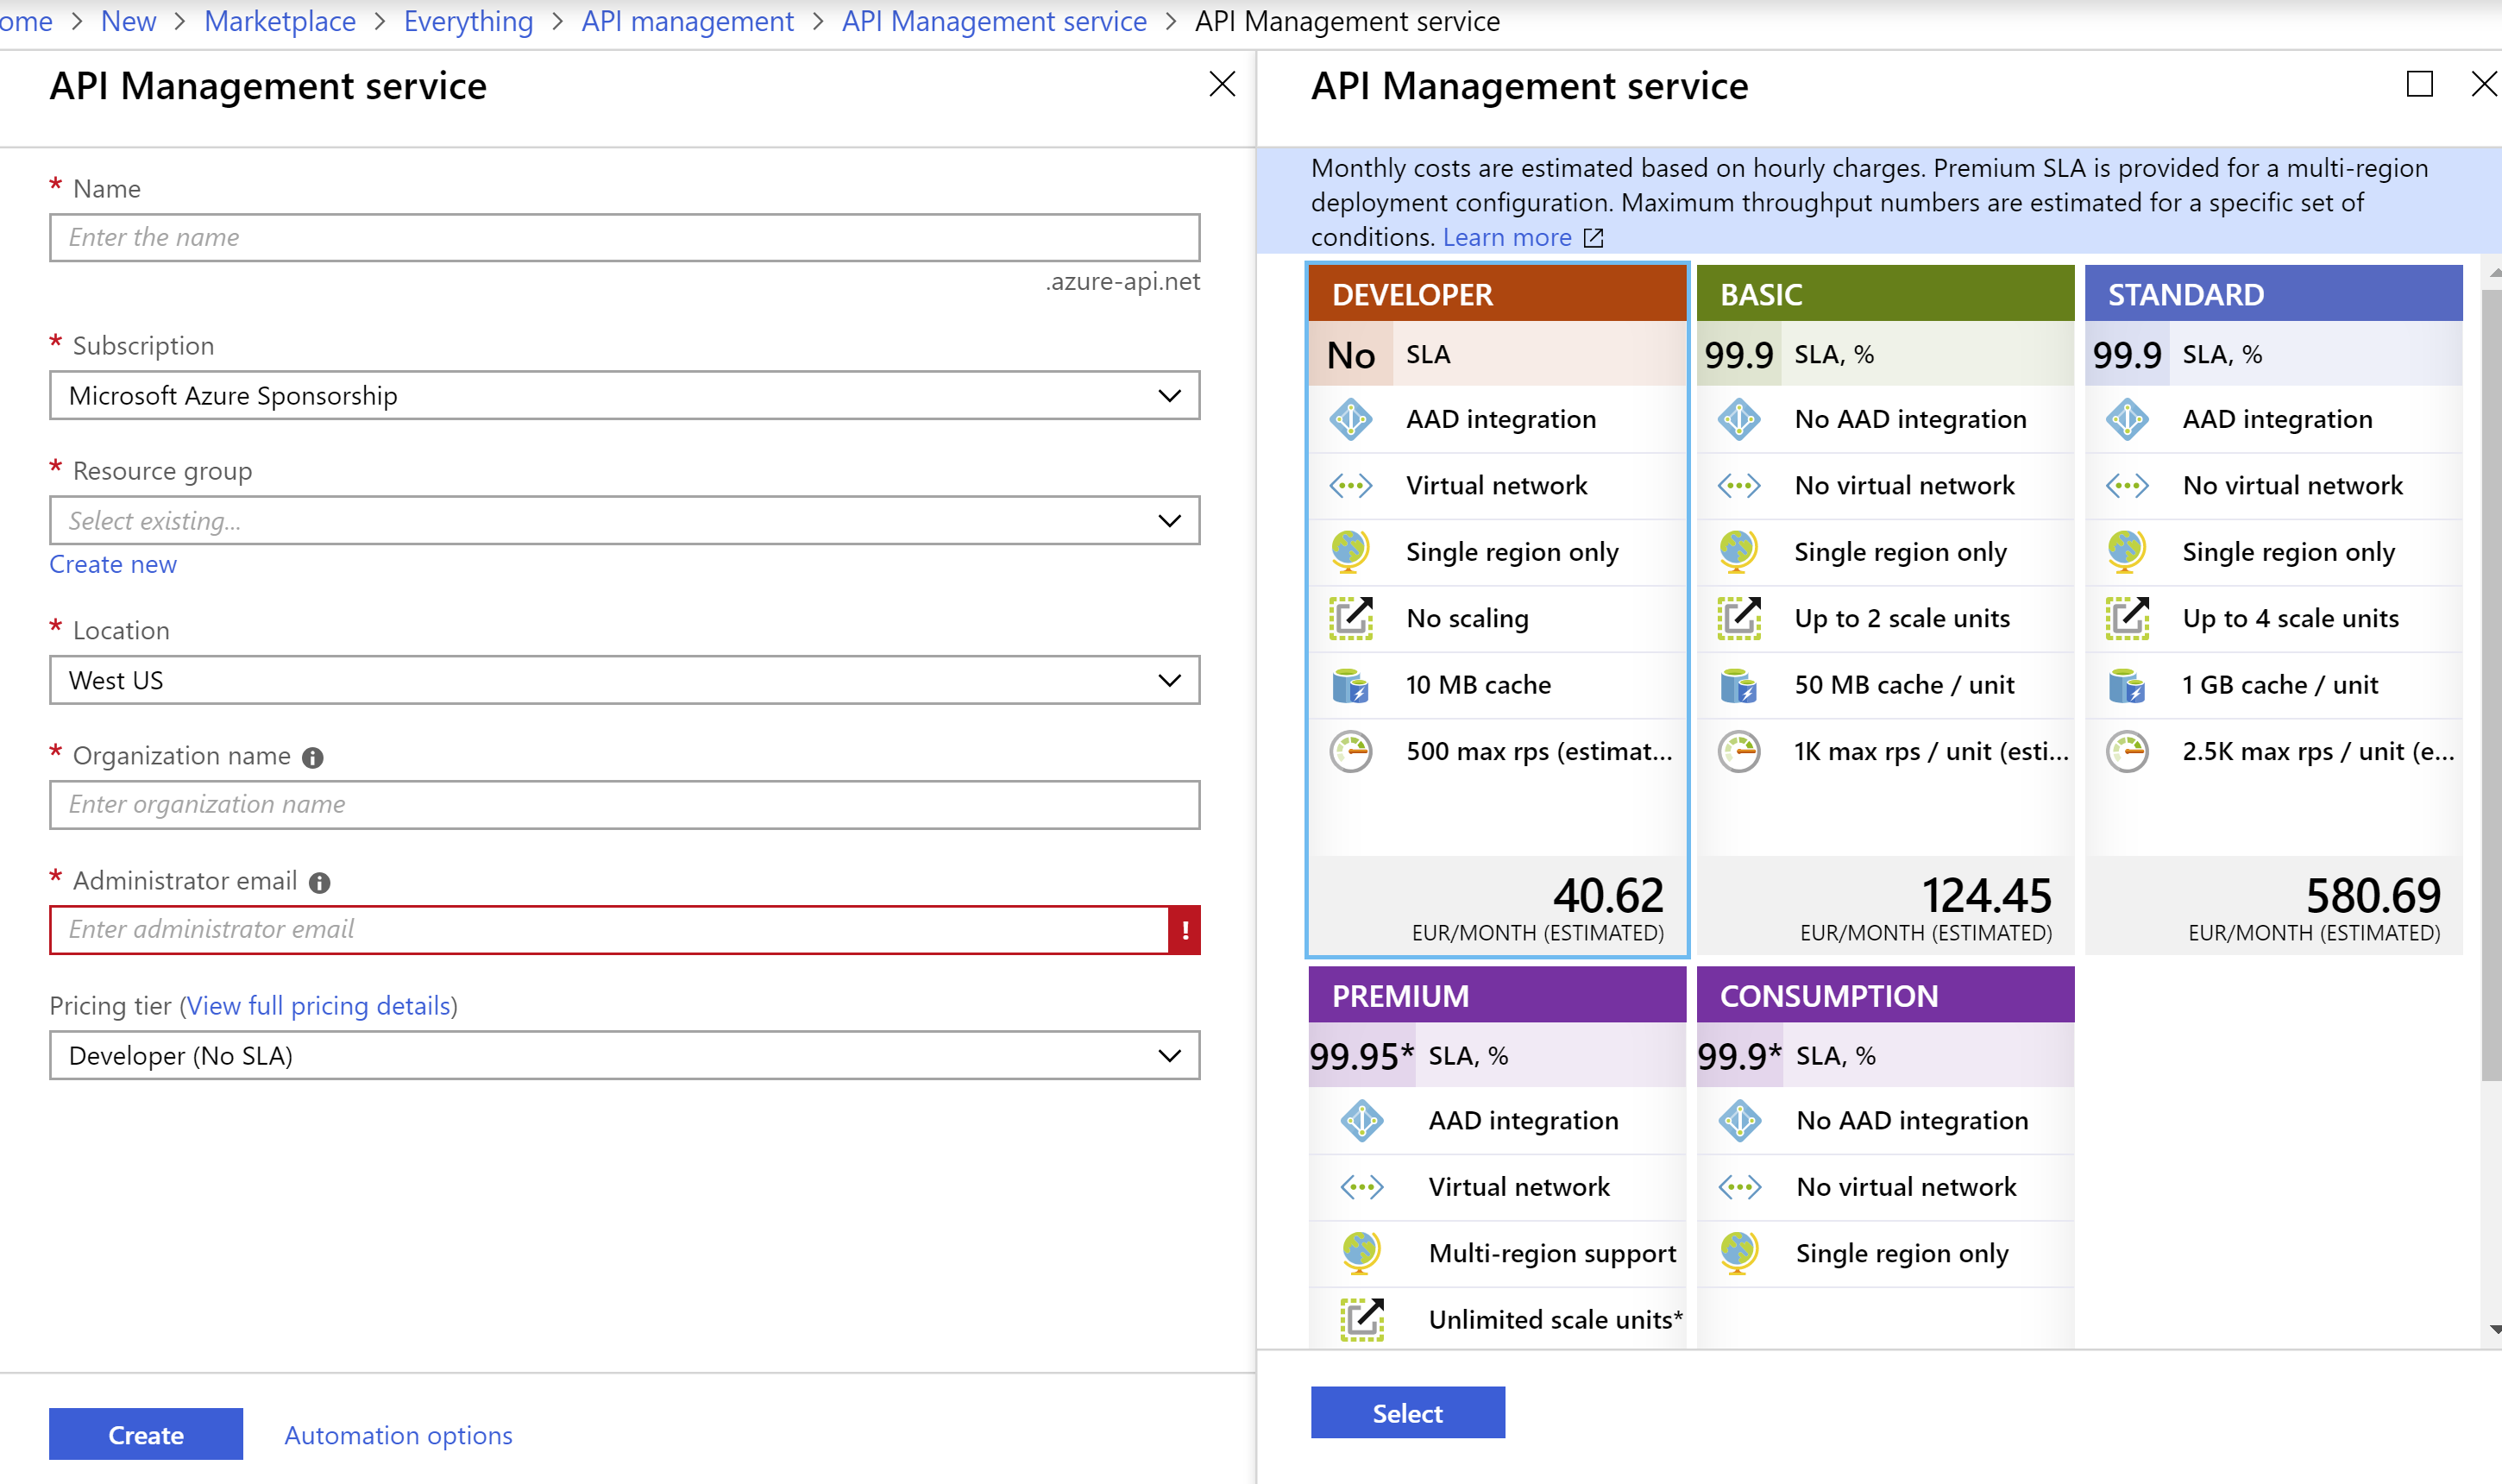
(Create Azure API Management blade in the Azure portal)
- Click Create to deploy the new API Management instance. This will take a while to complete
When the deployment is done, you can take a look at your API Management instance. When it is new, it is just an empty gateway that is not exposing anything. So let's give it an API to expose and protect:
- Click on the APIs menu
- Click Add API
- Select OpenAPI specification, as the API that we are going to protect is discoverable with this protocol
- Put this URL (http://conferenceapi.azurewebsites.net/?format=json) in the OpenAPI specification textbox. This will fill in most of the other textboxes automatically. The URL is a demo API that is created by Microsoft
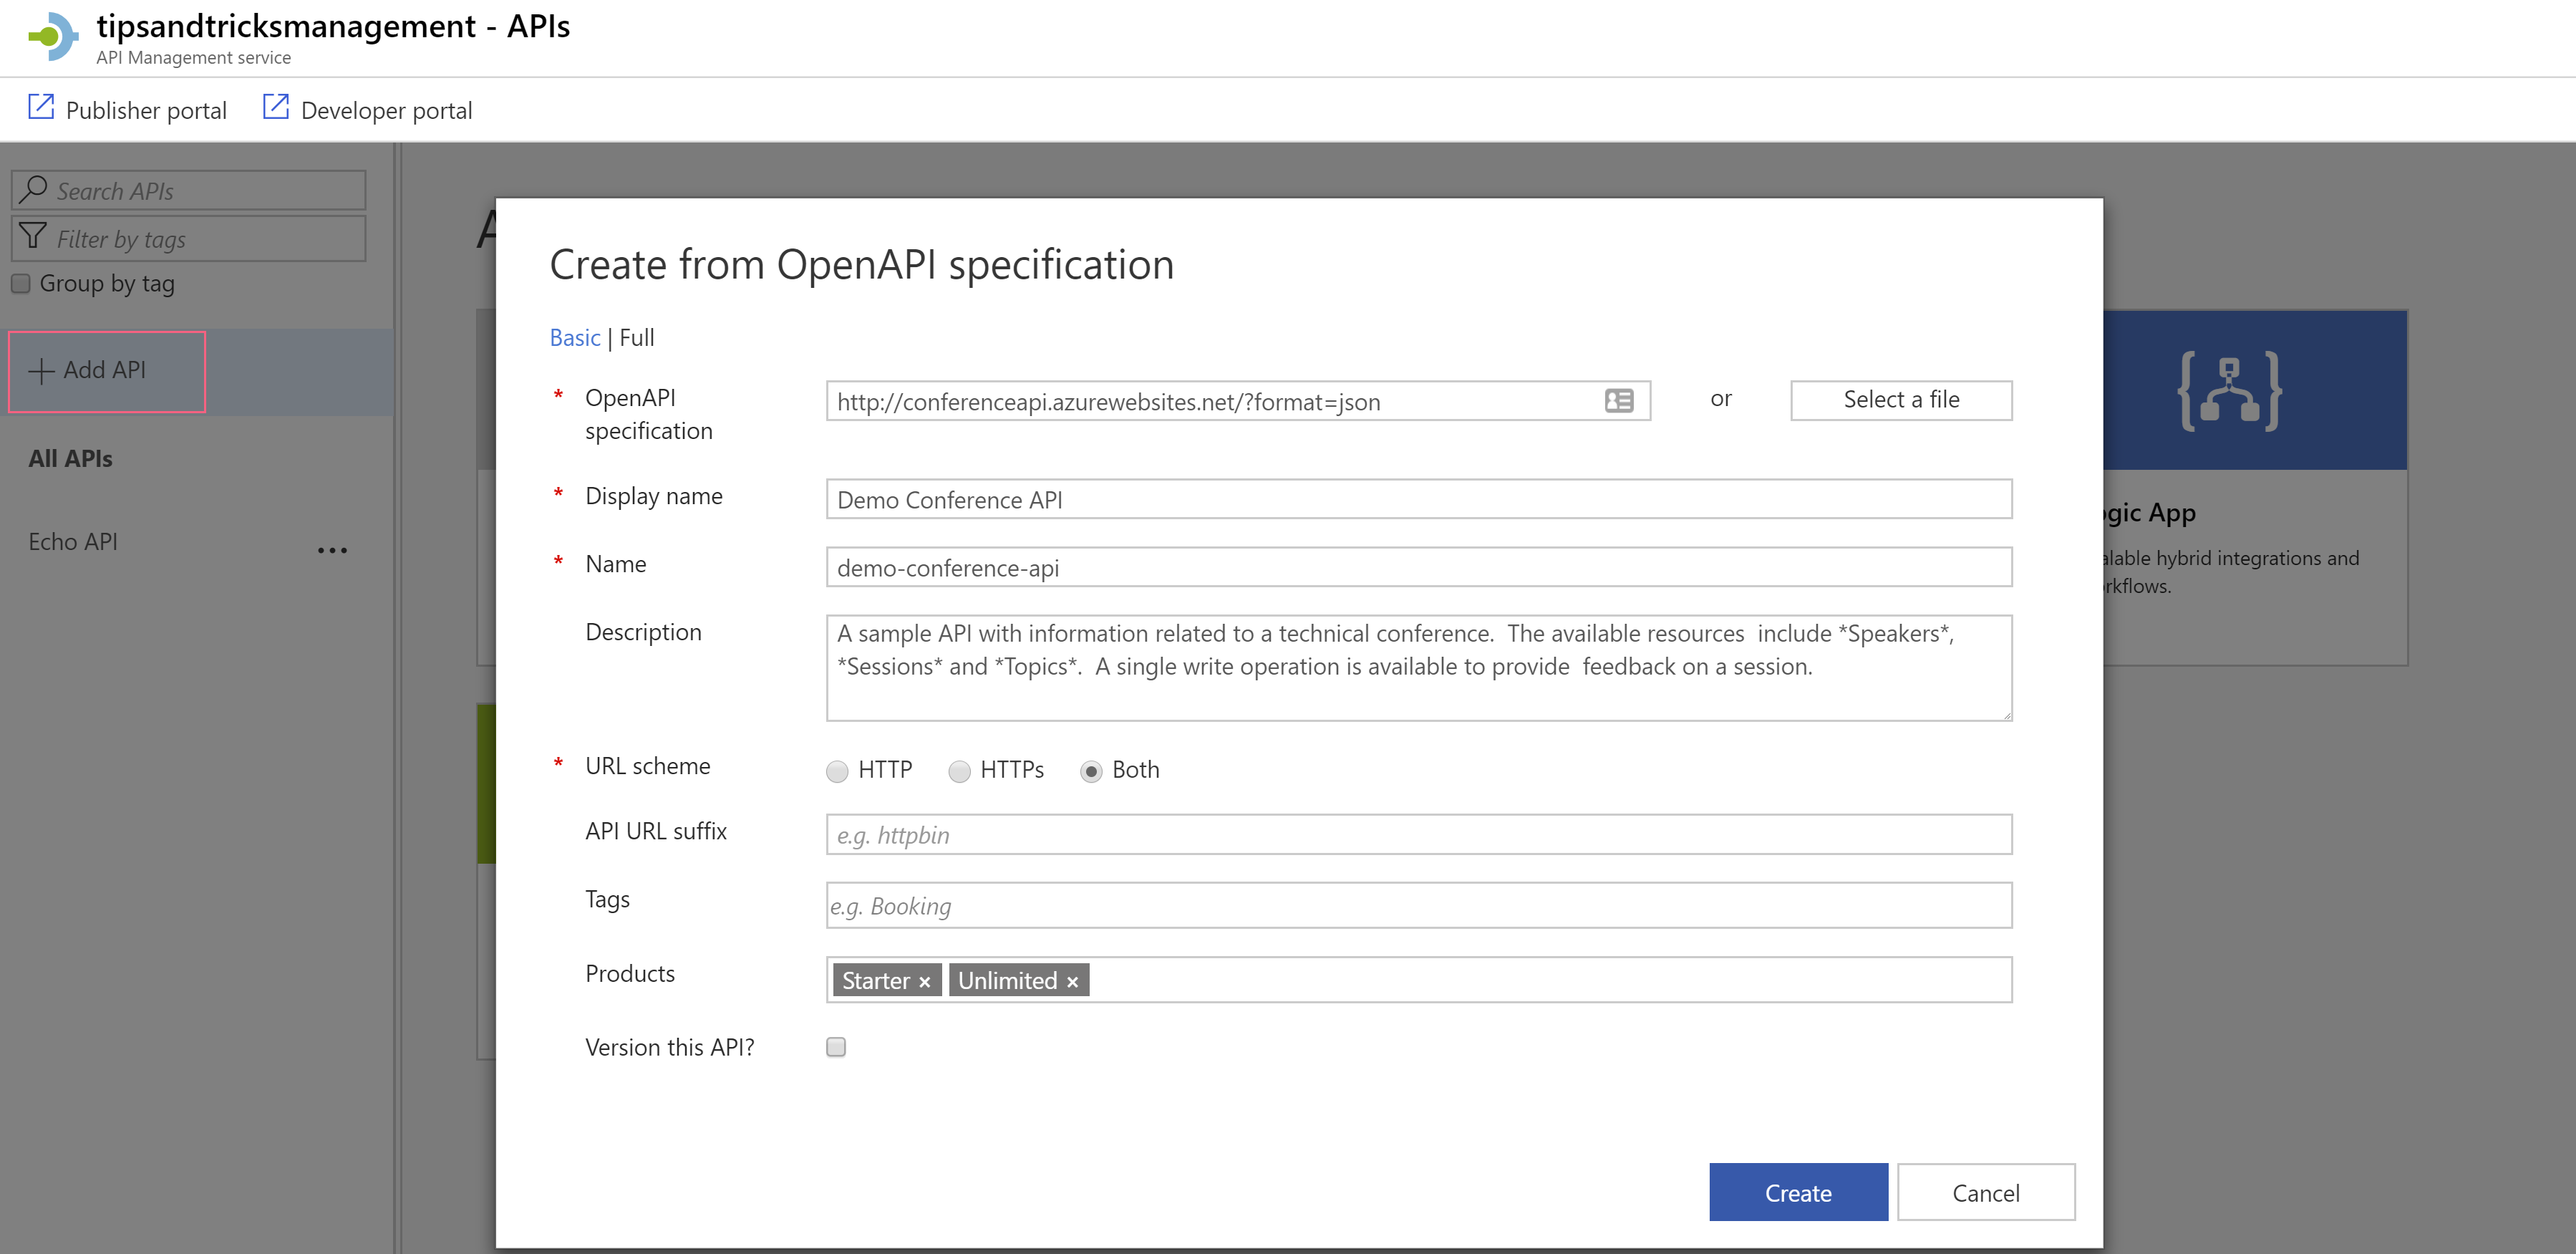
(Add a new API in the Azure portal)
- Make sure that you select one or more products to associate with this API. You need this to publish the API. I will tell you more about products later on
- Click Create to add and publish the API. The API is now available on a URL like this https://tipsandtricksmanagement.azure-api.net/
We now have an API that is protected and exposed by API management. And so, we can try it out. We can test it out right here, from the Azure portal.
- In the APIs menu, click on the API that we've just added
- Click on the Test tab
- Select the GetSessions method to test
- Leave all of the information as is and click Send. The API will now send back a response that is visible in the portal
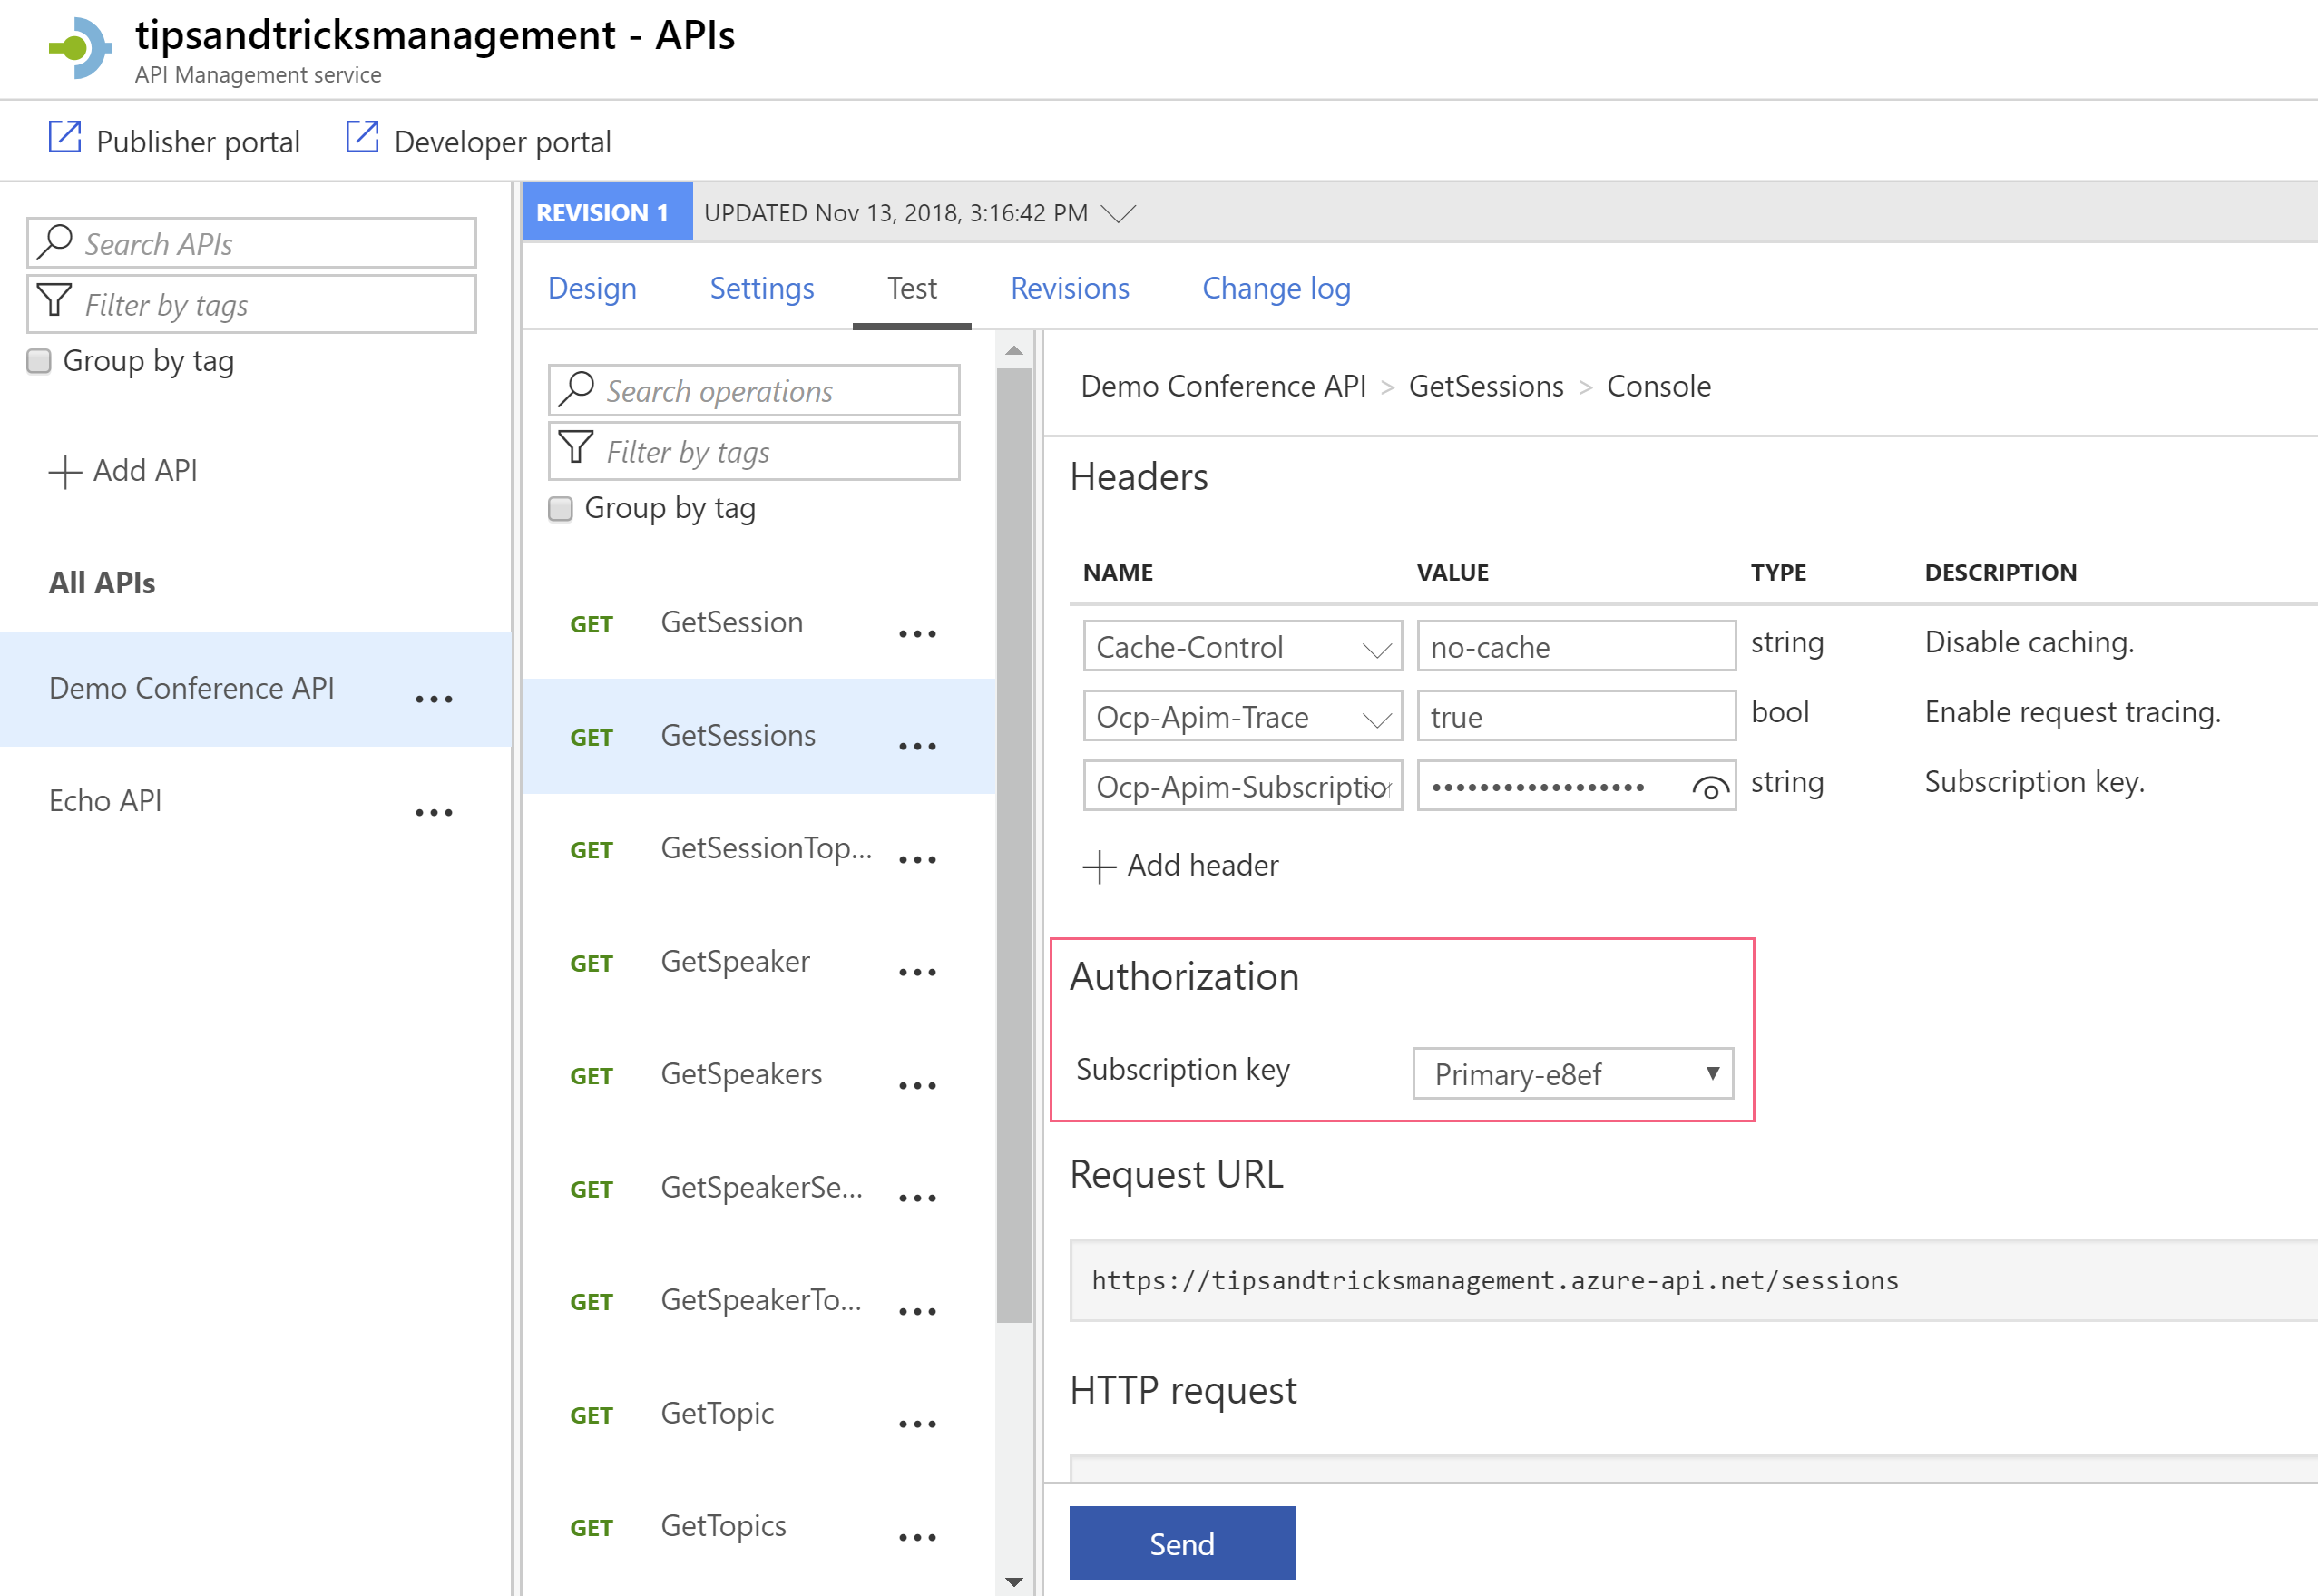
(Testing the API in the Azure portal)
When you test the API from the Azure portal, you might notice that you can select a subscription key that is sent with the test, like in the image above. This key authorizes you to use the API as, per default, the API is protected and can't be used without authorization.
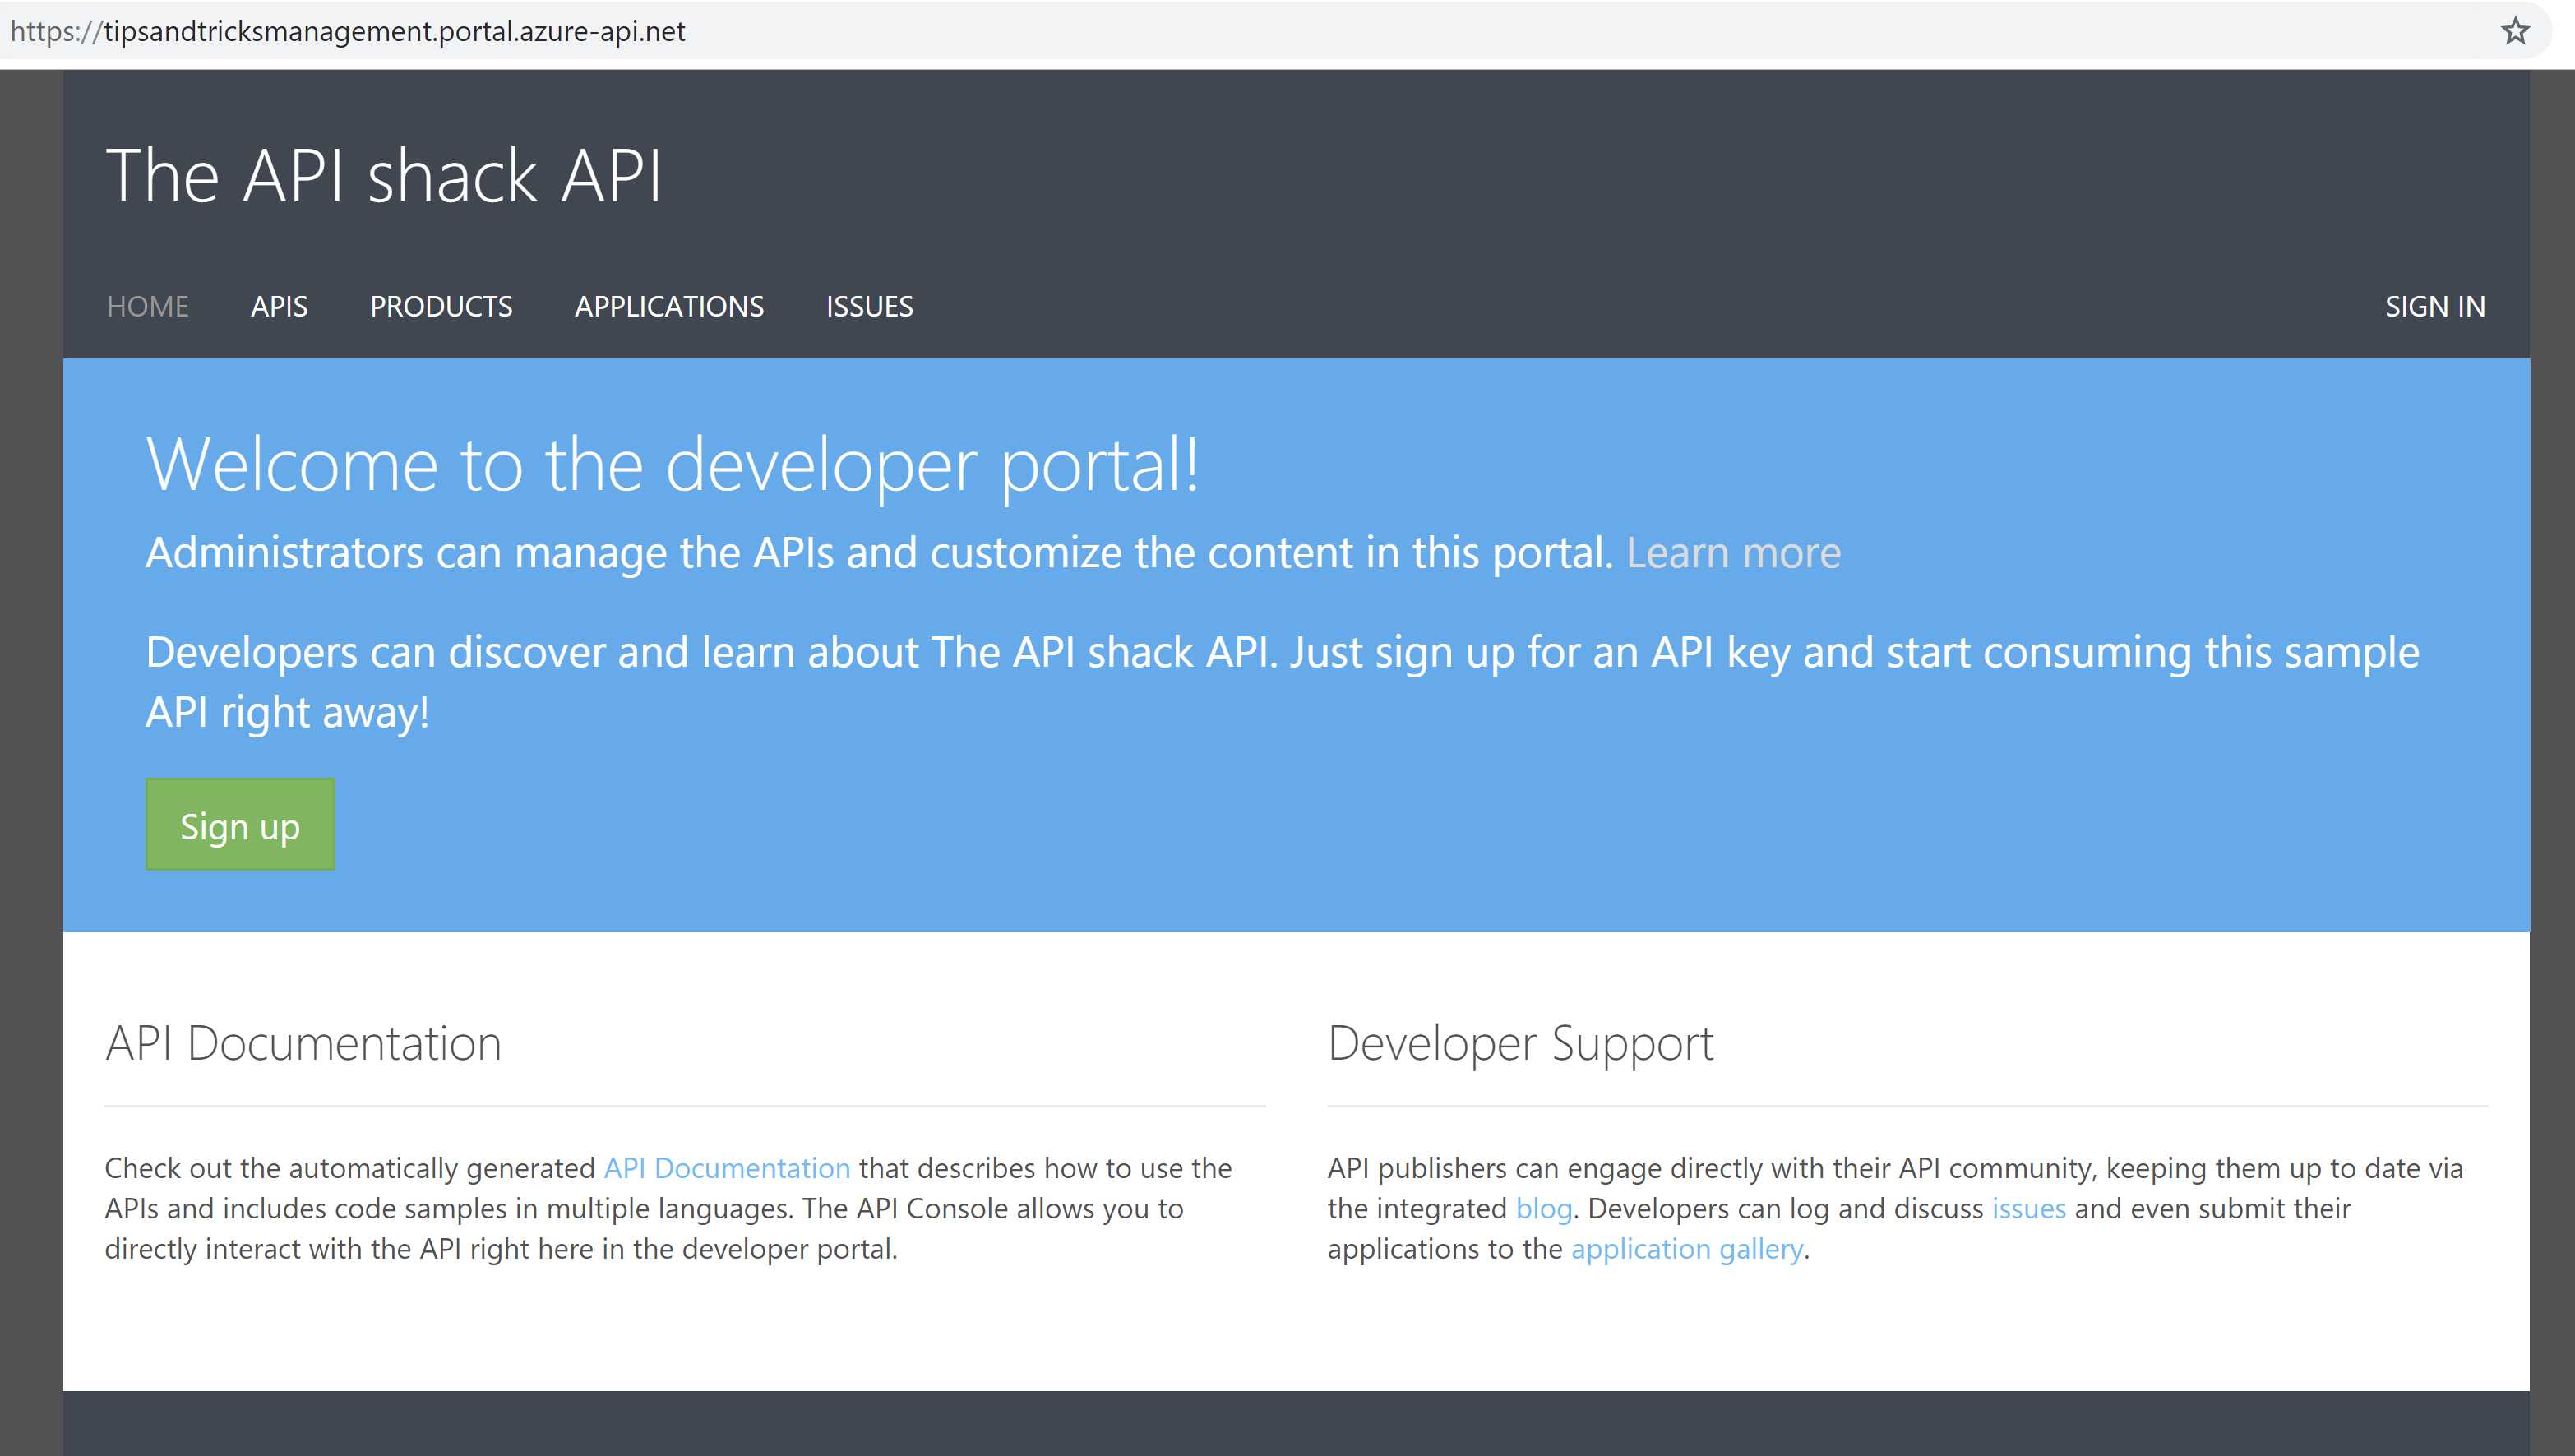
You can now also go to the developer portal and test the API. The developer portal is a website that users of the API will visit to test the API and get documentation about it. You can get to the developer portal by clicking on the Developer portal button in the top of the API Management service in the Azure portal.
Once you are in the developer portal, you can see the API, like in the image below.
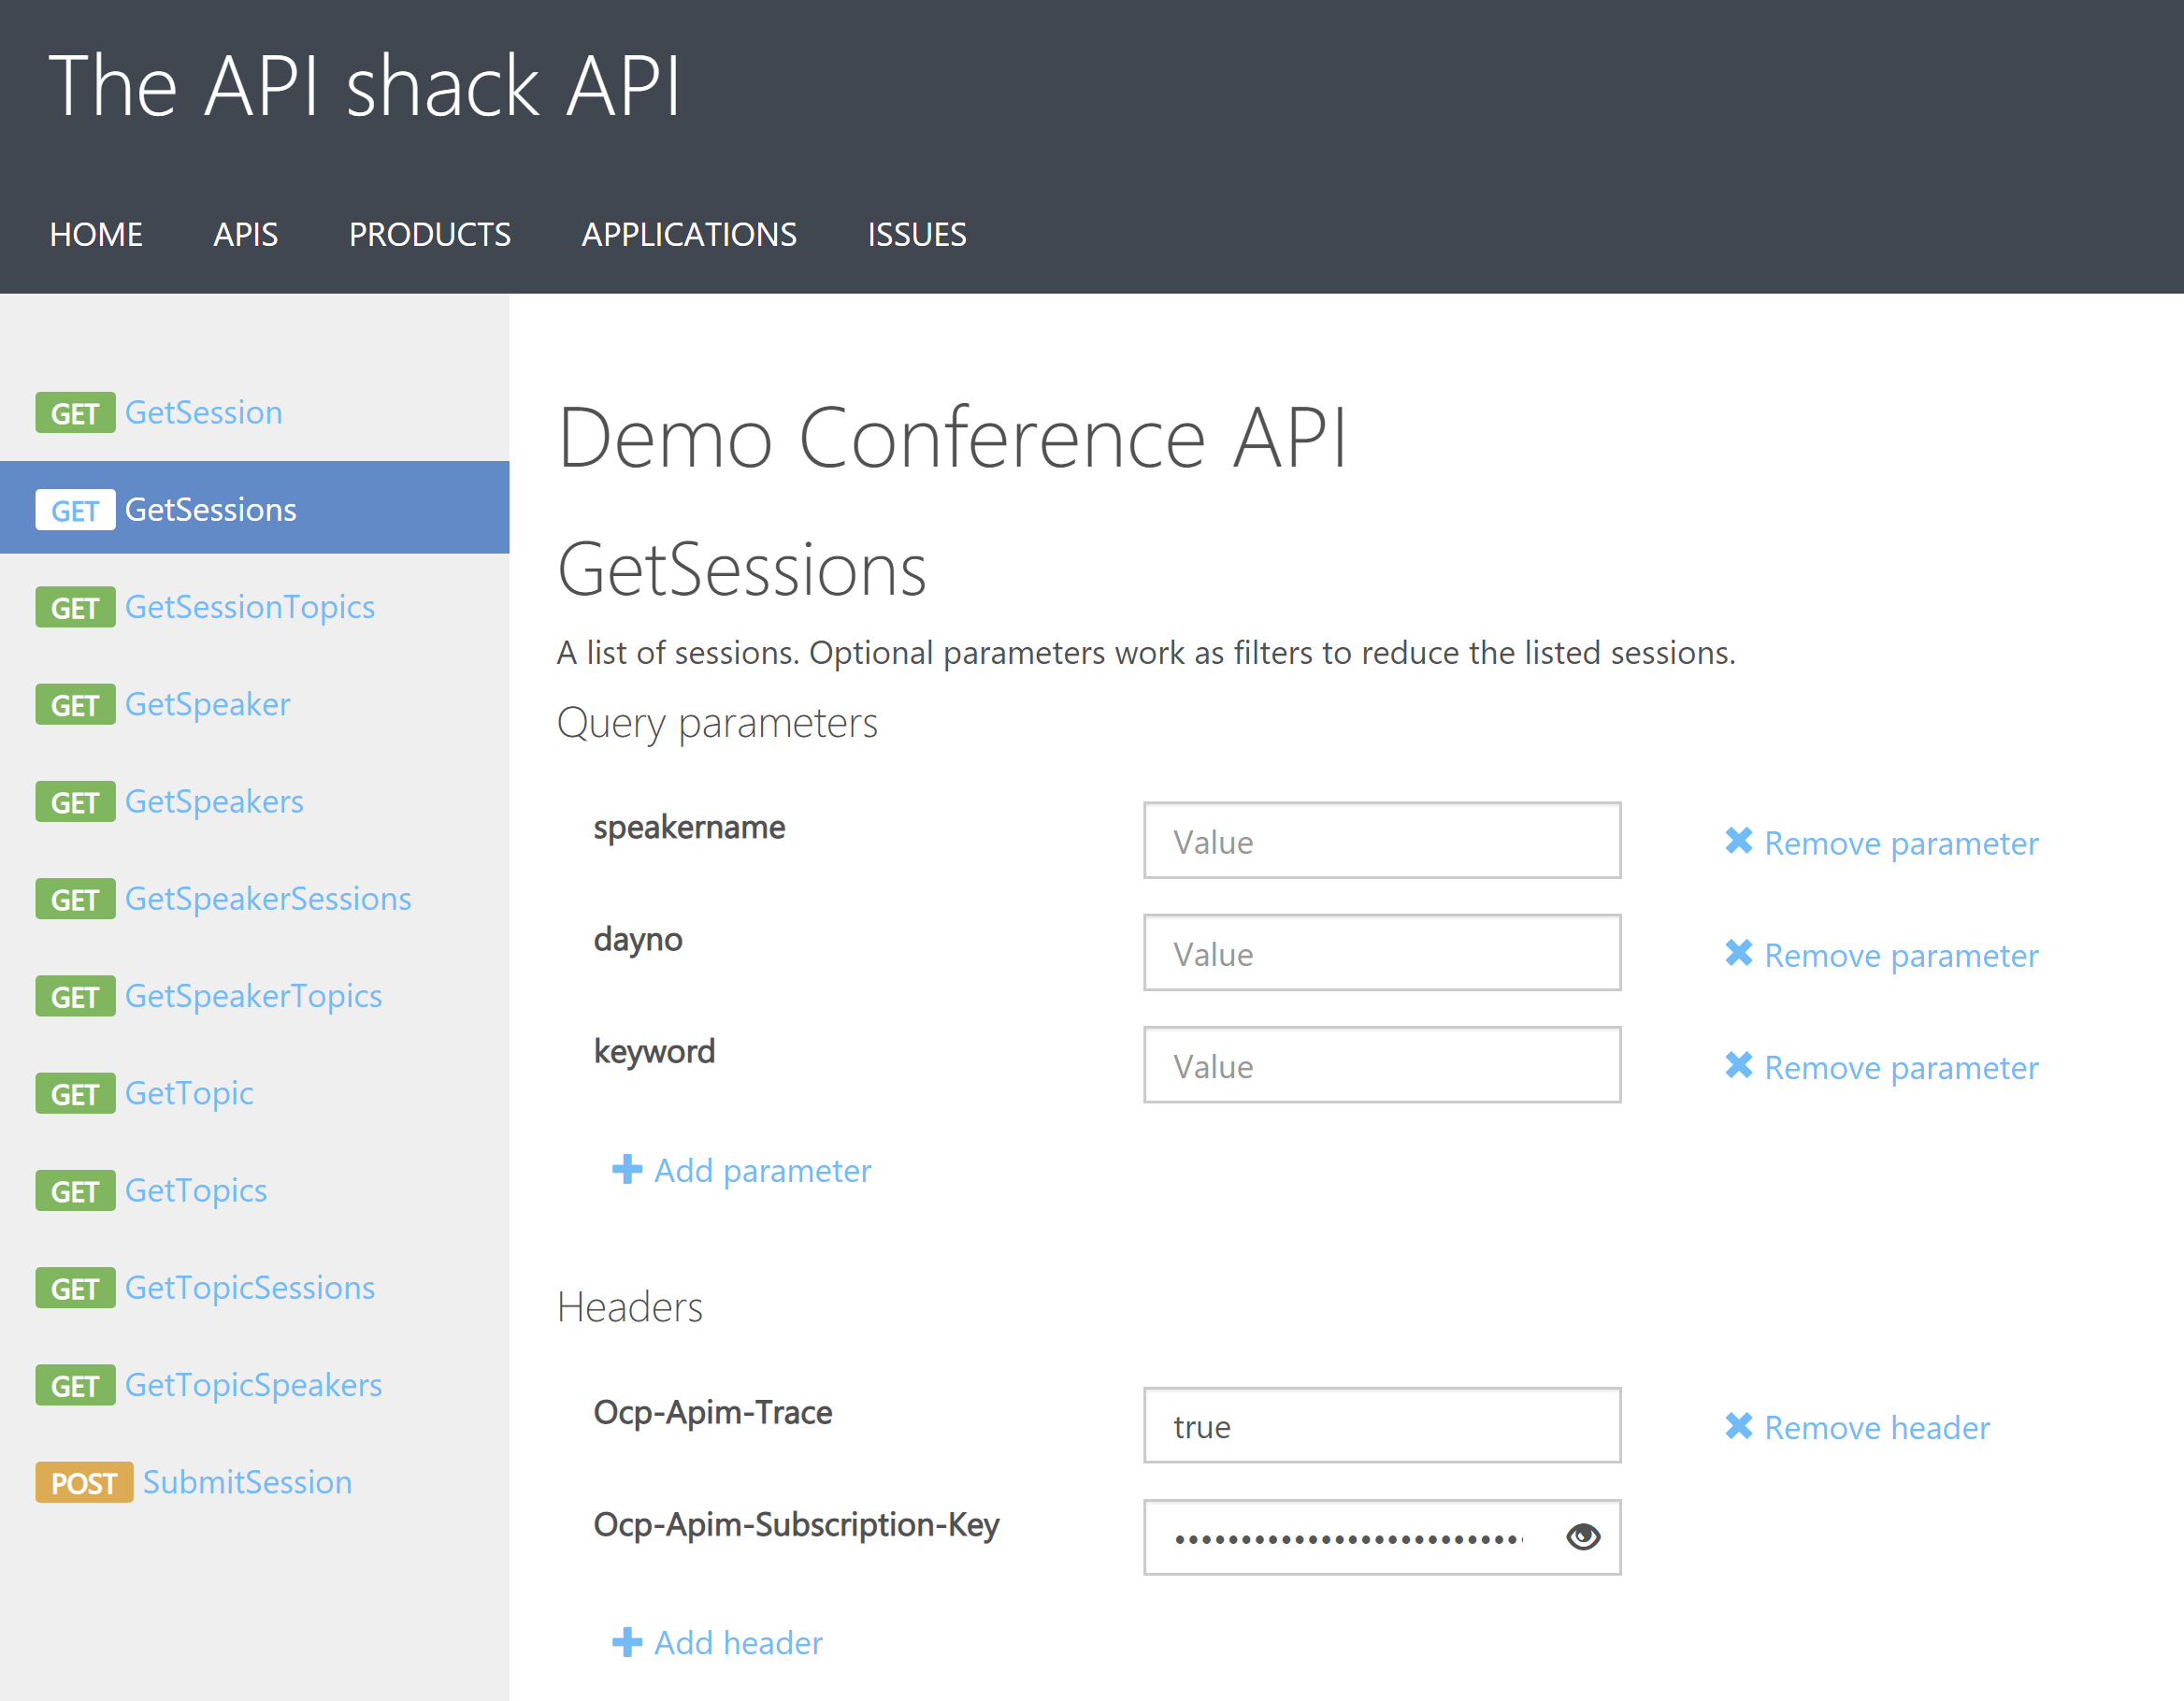
(Testing the API in the developer portal)
# Monetizing your API with subscriptions and products
Now that we have an API that is being exposed and protected by API Management, we can start to monetize it. We do this using products and subscriptions.
You've already seen products when you added the API in the previous step. A product in API Management is a thing that represents API capabilities that you can sell to your customers. In a new API Management instance, there are already two products added, the Starter and the Unlimited product. In the previous step, we've associated the Starter product with the demo API. This means that customers can create a subscription to the Starter product and get access to the API as far as the product allows it. The product itself defines which capabilities customers (users) can use and how much of them they can use.
So the relationship between subscriptions, products and API is this:
- Product
- Has one or more APIs associated with it
- Defines the capabilities and limits of the APIs associated with it
- Has one or more Subscriptions to it
- A Subscription has a user associated with it
Users can create subscriptions for your API by signing up in the developer portal. This is your public portal that you can use to sell subscriptions to your APIs and for users to start using it. The developer portal comes with lots of features out-of-the-box and you can customize it fully to fit your style and support your payment methods.
(Users can sign up to use an API in the developer portal)
The products determine which capabilities you expose and how much they can be used. The starter product, for instance, has some policies set on it that limit its usage. It has a rate limit of 5 calls per 60 seconds. And a quota that restricts the user to a total of 100 calls per 7 days. You can also restrict the amount of data going in and out and even transform XML to JSON using policies.
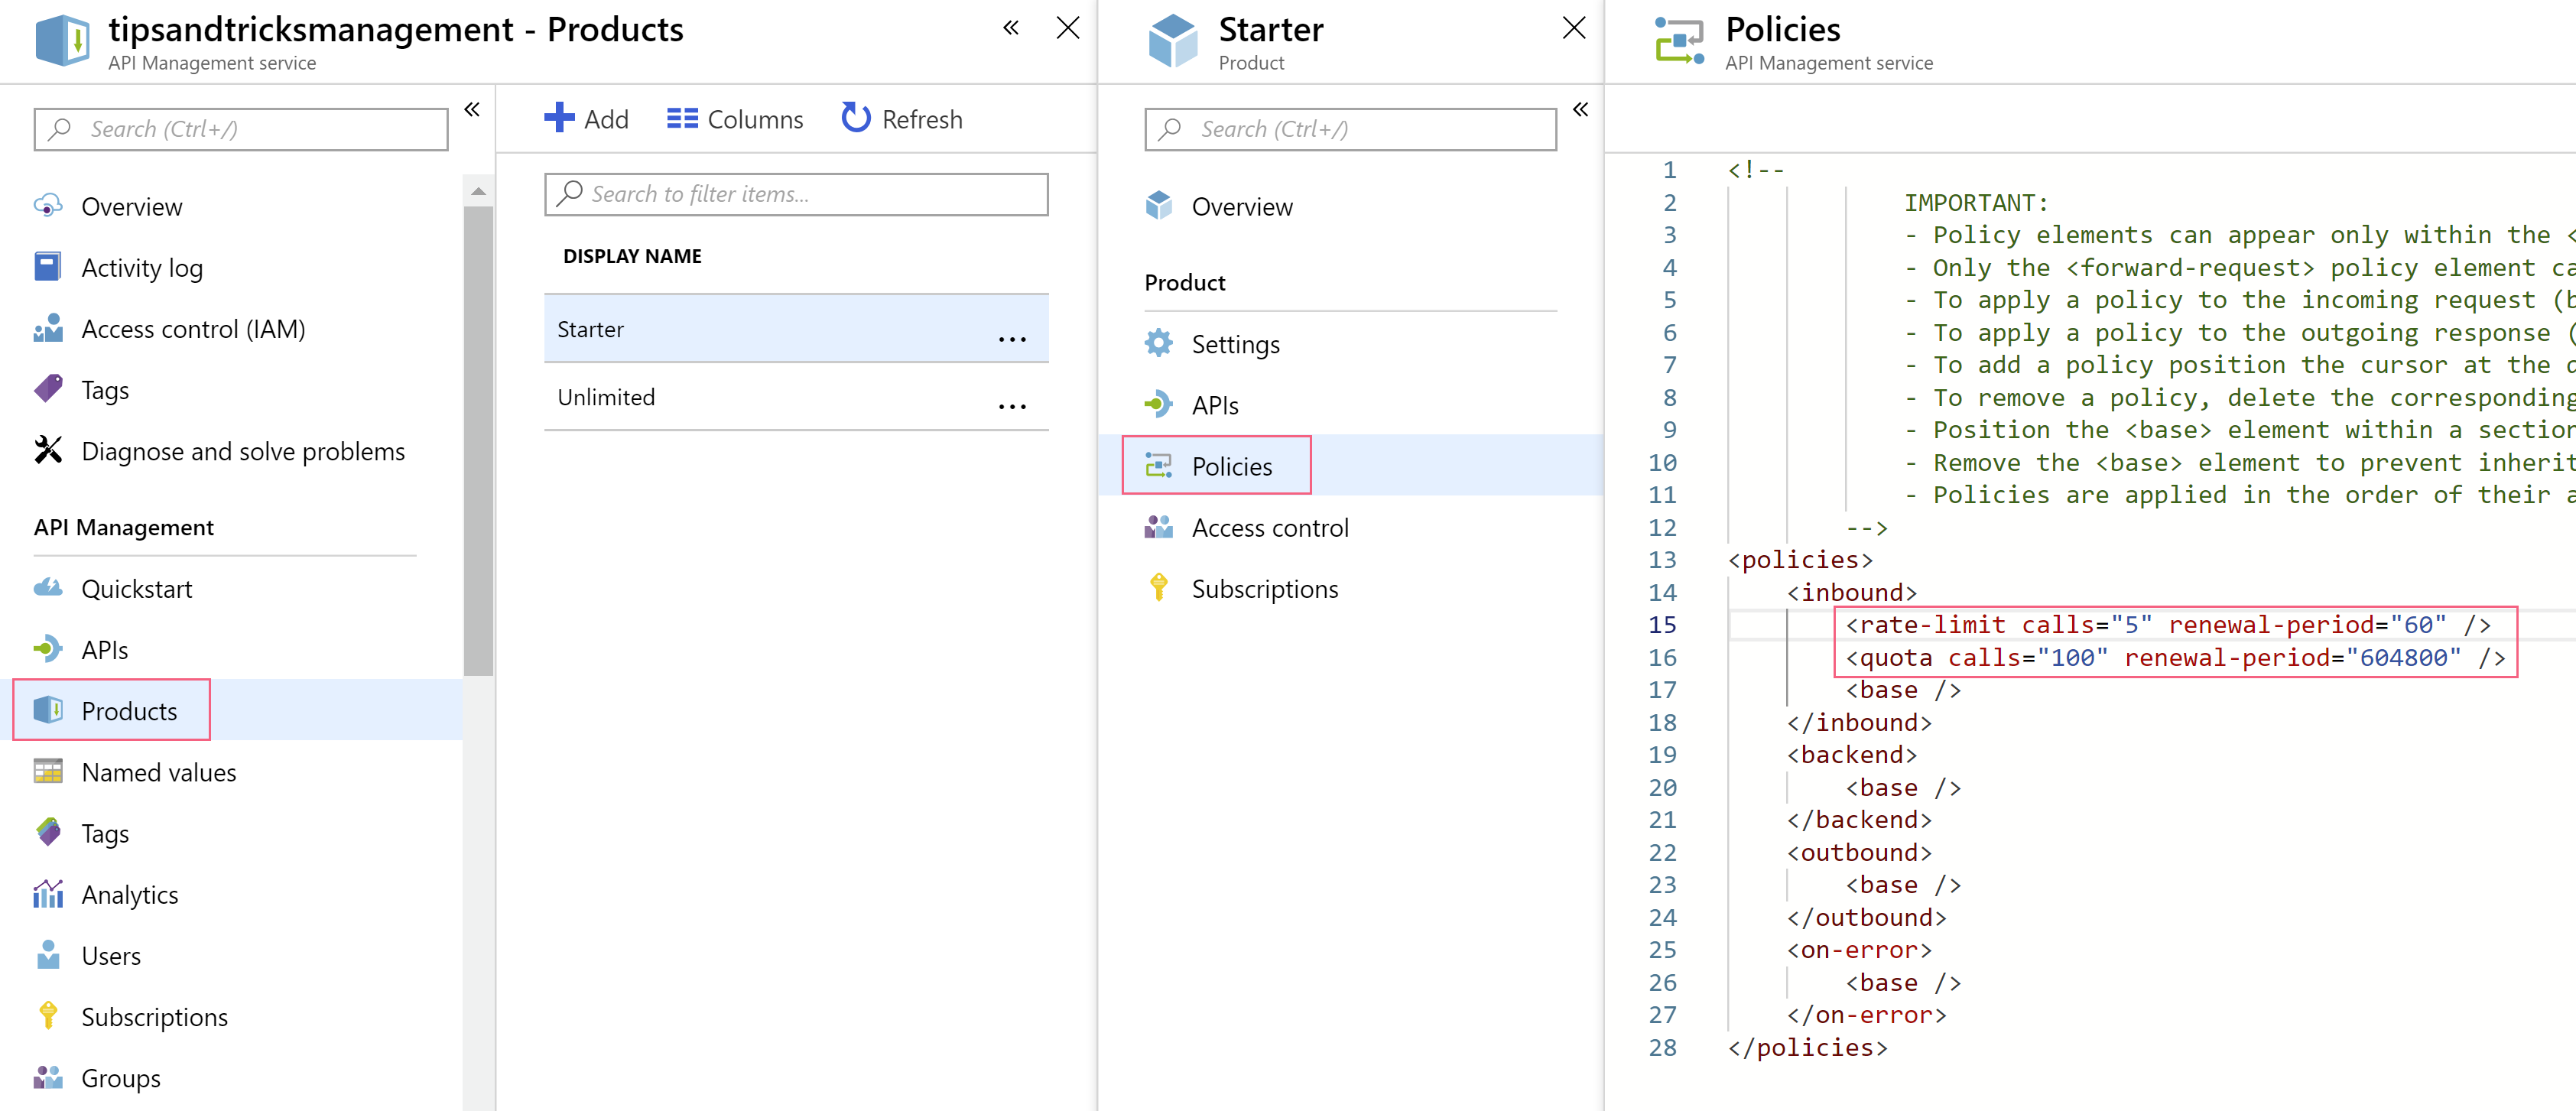
(Set policies on a product in the Azure portal)
You can set policies on a product, and you can even apply them to a specific user or subscription.
And once you have users that use your APIs, you can monitor how they use your API. You can track this in detail by analyzing how many call a certain user makes and from where the calls are made. Pretty cool, right?
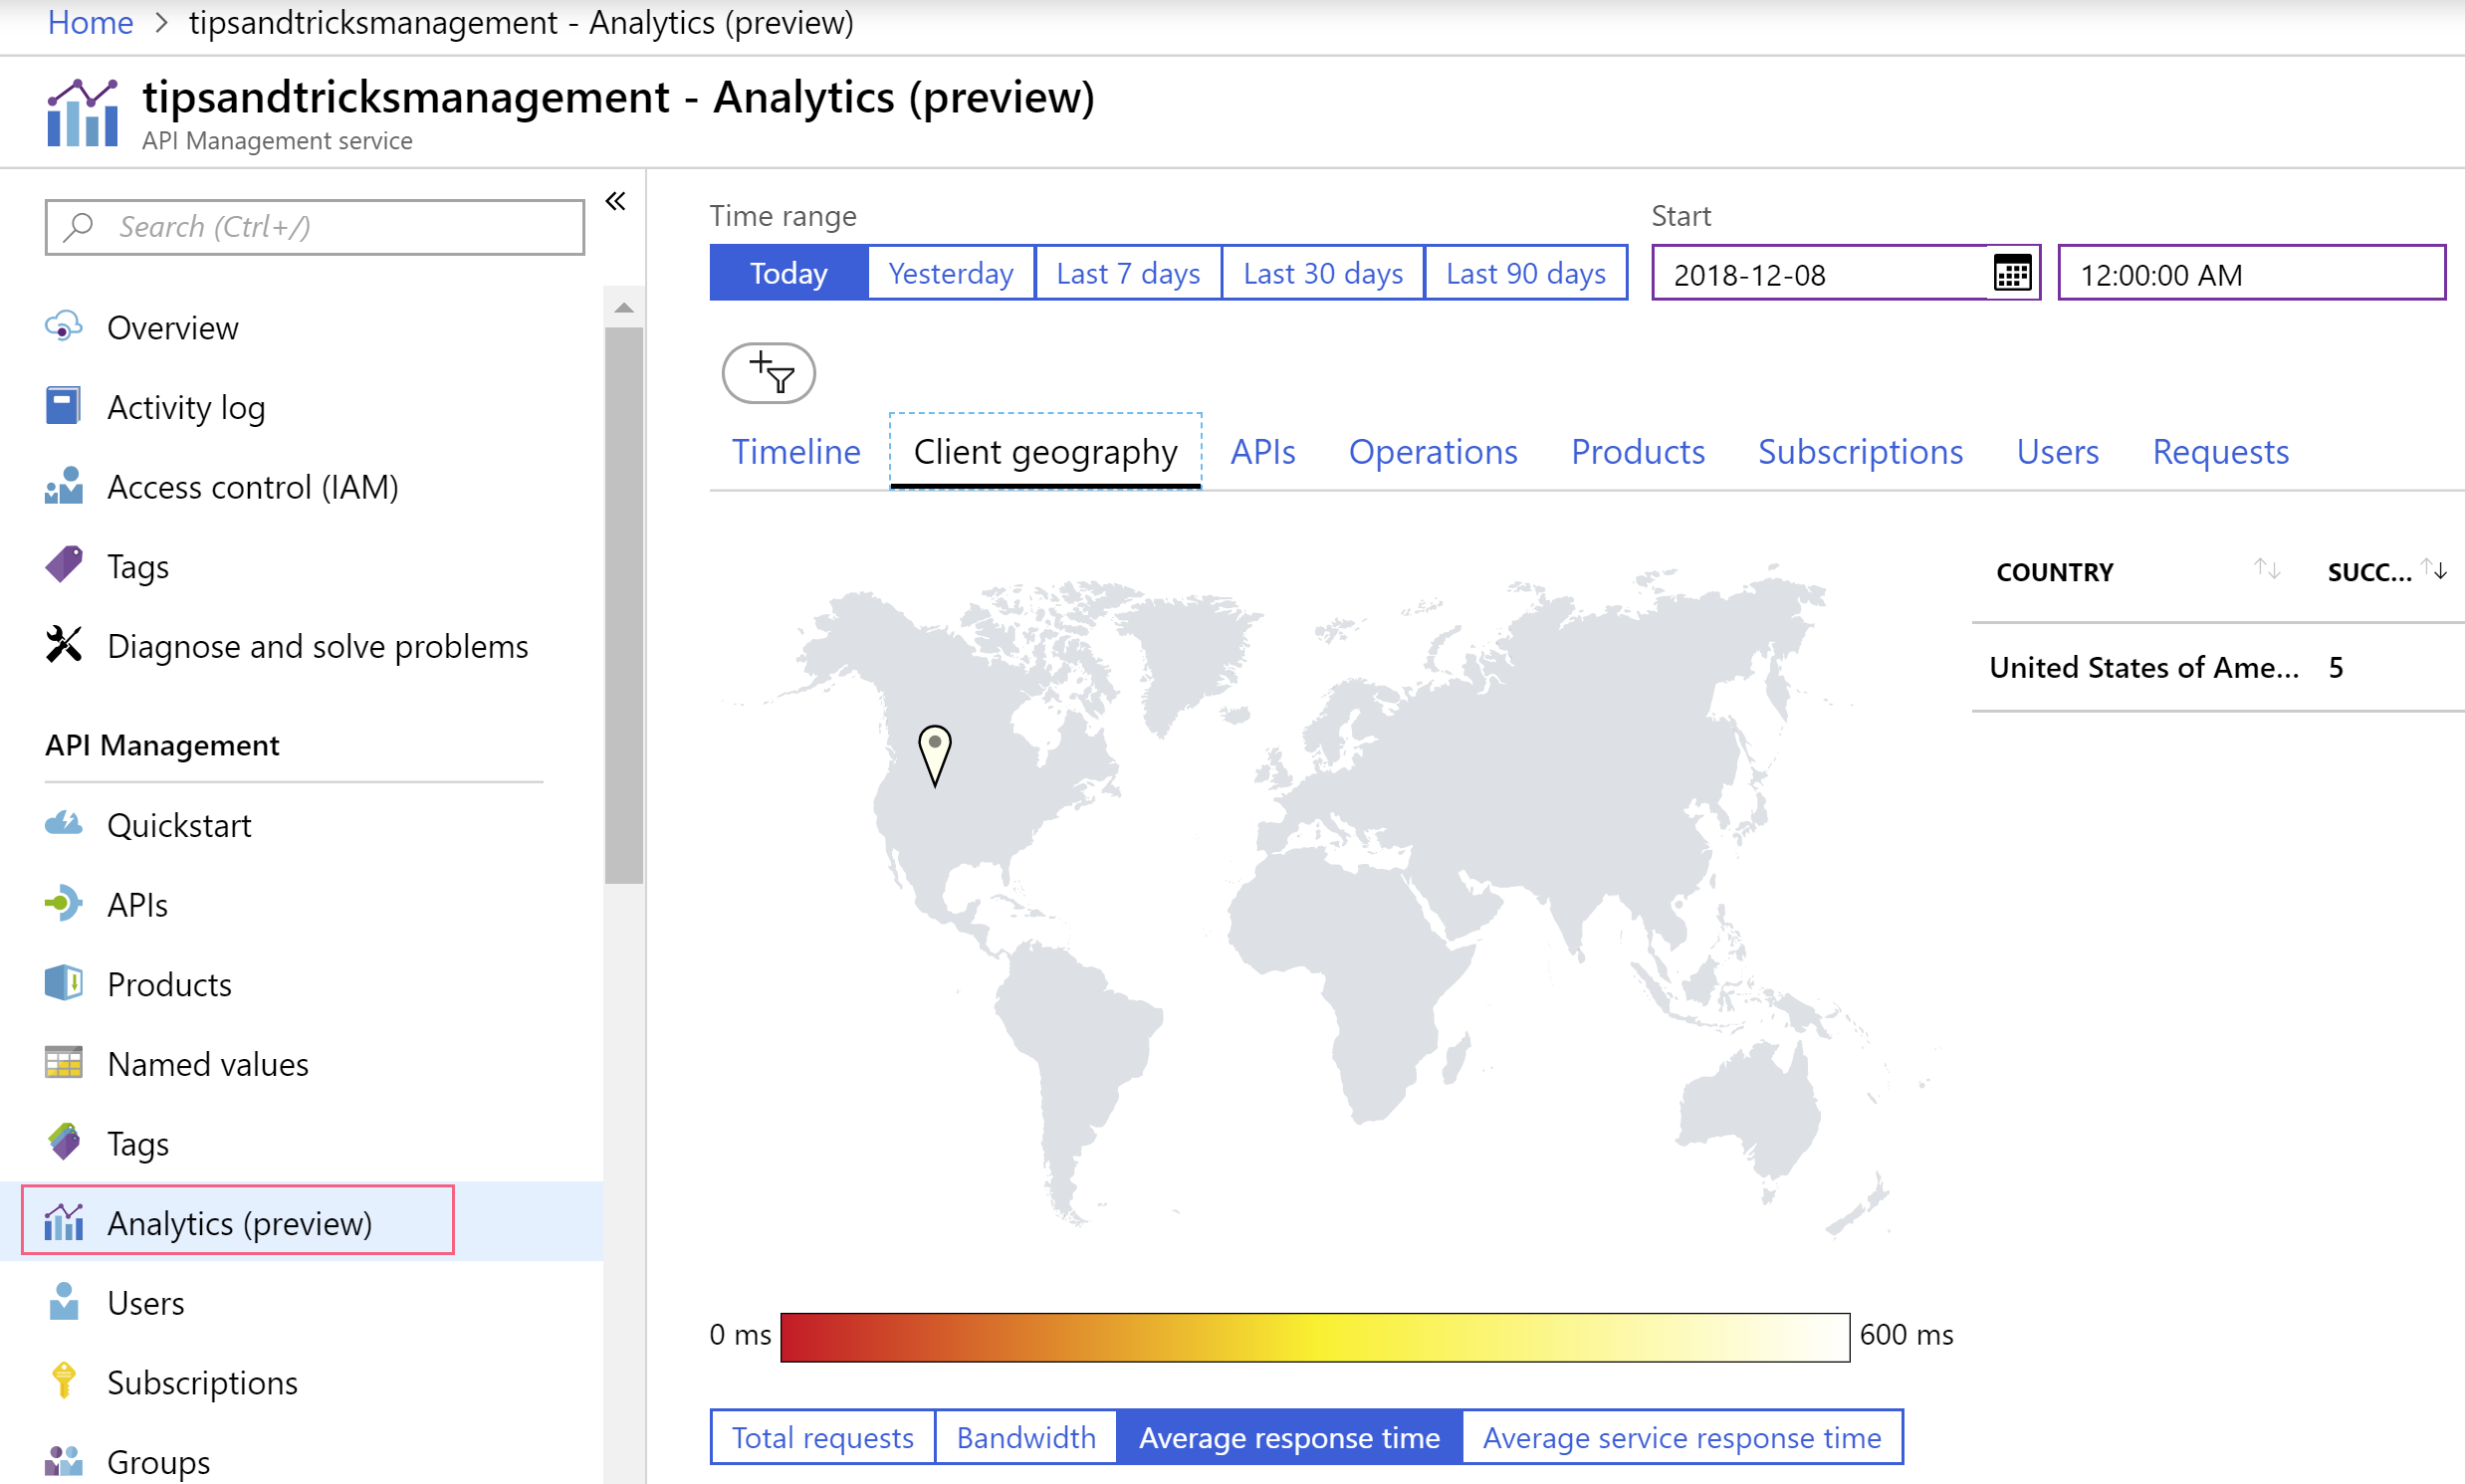
(Analyze API usage in the Azure portal)
# Conclusion
Azure API Management is a very powerful and versatile product. In this post, you've seen only some of its capabilities. You can do a lot more with API Management, like version your API, secure it and monitor it. Go and check it out (opens new window)!