Task 02: Create a high sign-in risk policy
Security Architecture Team
-
Have the team enable a User risk policy to automatically require users with detected high-risk accounts to securely reset their passwords and re-authenticate.
-
Enable Sign-in risk policy to block or challenge sign-ins identified as high-risk based on suspicious or anomalous login behavior.
Security Engineering and Administration
01: Set up user risk policy
-
In a new browser tab, go to
entra.microsoft.com. -
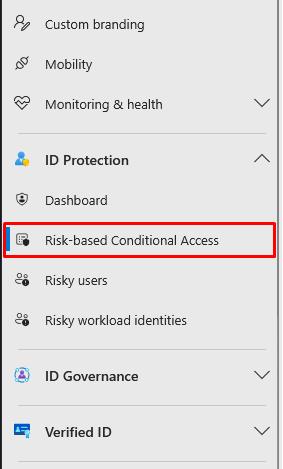
In the leftmost pane, go to ID Protection > Risk-based Conditional Access.
-
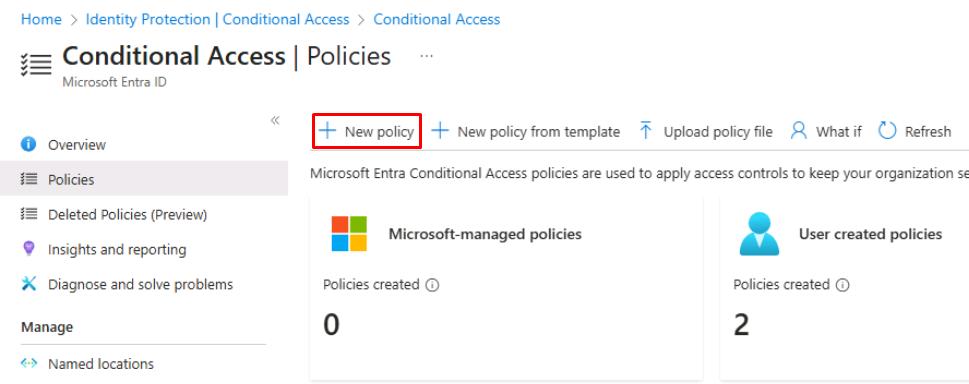
On the top bar, select New policy.
-
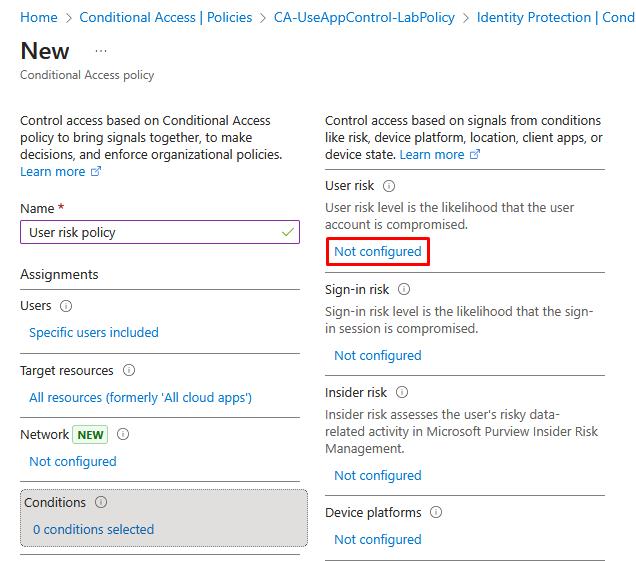
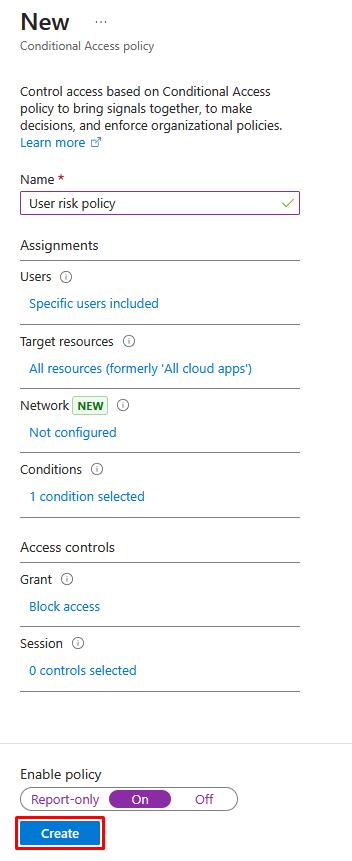
For Name, enter
User risk policy. -
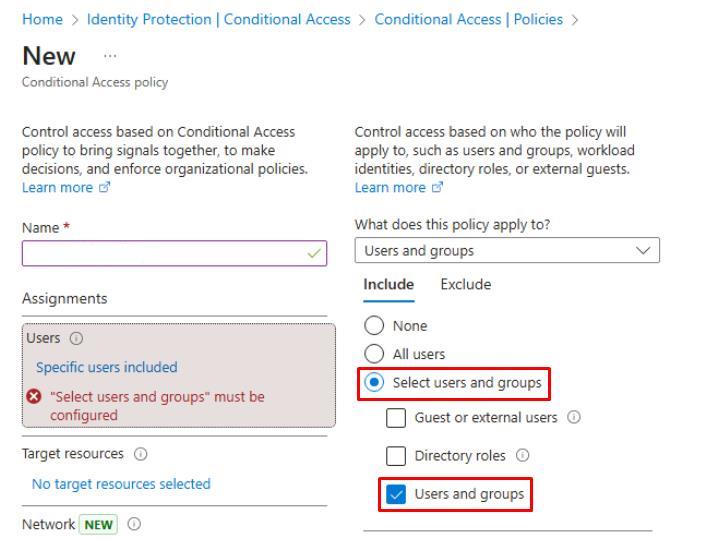
Under Users, select 0 users and groups selected.
-
Under the Include tab, select Select users and groups > Users and groups.
-
In Select users and groups, search for and select
XDR-Pilot-Group. -
At the bottom of the pane, select Select.
-
-
Under Target resources, select No target resources selected.
- Under the Include tab, select All resources.
-
Under Conditions, select 0 conditions selected.
-
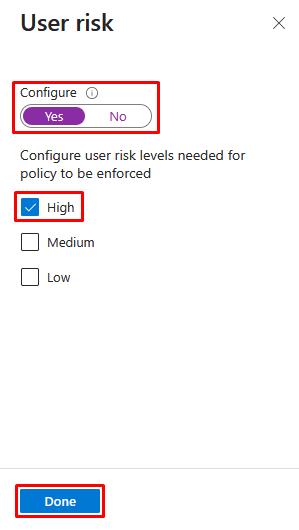
Under User risk, select Not configured.
-
In the flyout pane, select Yes, select High, then select Done.
-
-
Under Grant, select 0 controls selected.
- In the flyout pane, select Block access, then select Select.
-
Under Enable policy, select On.
In production, you should always test policies in Report-only first.
-
Select Create.
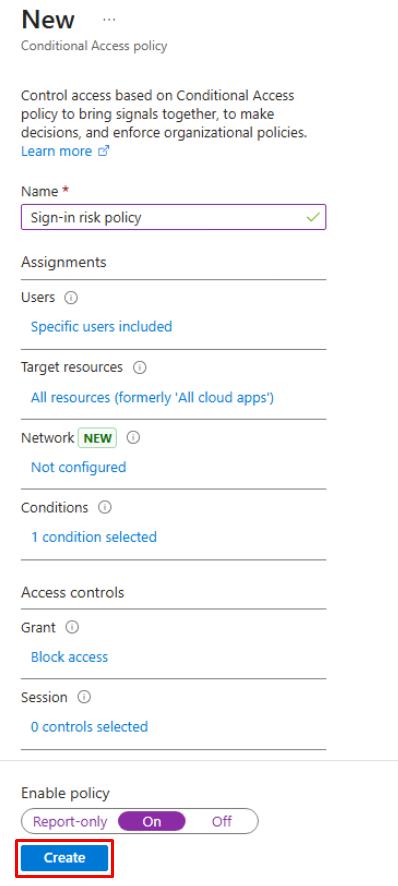
02: Set up sign-in risk policy
-
On the top bar, select New policy again.
-
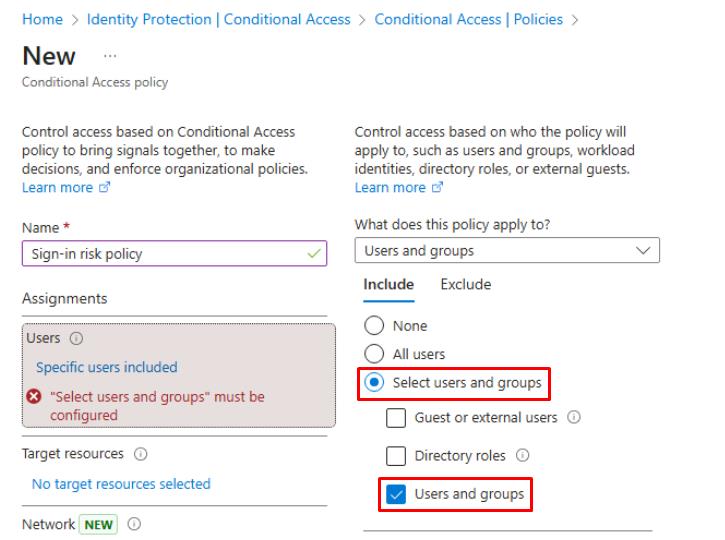
For Name, enter
Sign-in risk policy. -
Under Users, select 0 users and groups selected.
-
Under the Include tab, select Select users and groups > Users and groups.
-
In Select users and groups, search for and select
XDR-Pilot-Group. -
At the bottom of the pane, select Select.
-
-
Under Target resources, select No target resources selected.
- Under the Include tab, select All resources.
-
Under Conditions, select 0 conditions selected.
-
Under Sign-in risk, select Not configured.
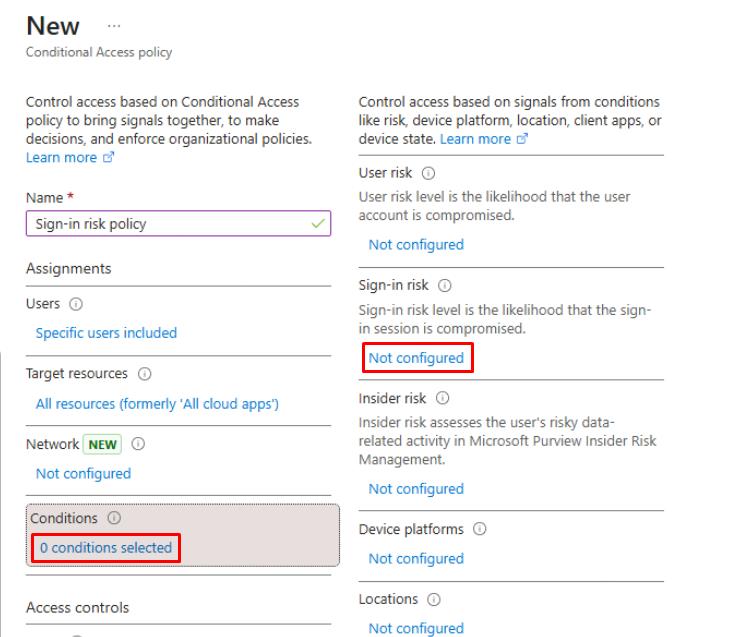
-
In the flyout pane, select Yes, select High, then select Done.

-
-
Under Grant, select 0 controls selected.
- In the flyout pane, select Block access, then select Select.
-
Under Enable policy, select On.
In production, you should always test policies in Report-only first.
-
Select Create.
Policies may take 5-10 minutes to propagate.
SOC Analyst
-
In a new browser tab, go to
entra.microsoft.com. -
In the leftmost pane, go to ID Protection > Dashboard.
-
On the Identity Protection page’s menu, under Report, select Risky users.
-
On the Identity Protection page’s menu, under Report, select Risky sign-ins.
if any risky users or sign-ins are found, confirm the Risk state column shows access was Blocked or Remediation required.