Task 01: Turn on native automations (AIR) with approvals
Security Architecture Team
-
Go back to your Defender XDR portal tab.
-
In the leftmost pane, go to System > Settings.
-
Select Email & collaboration.
-
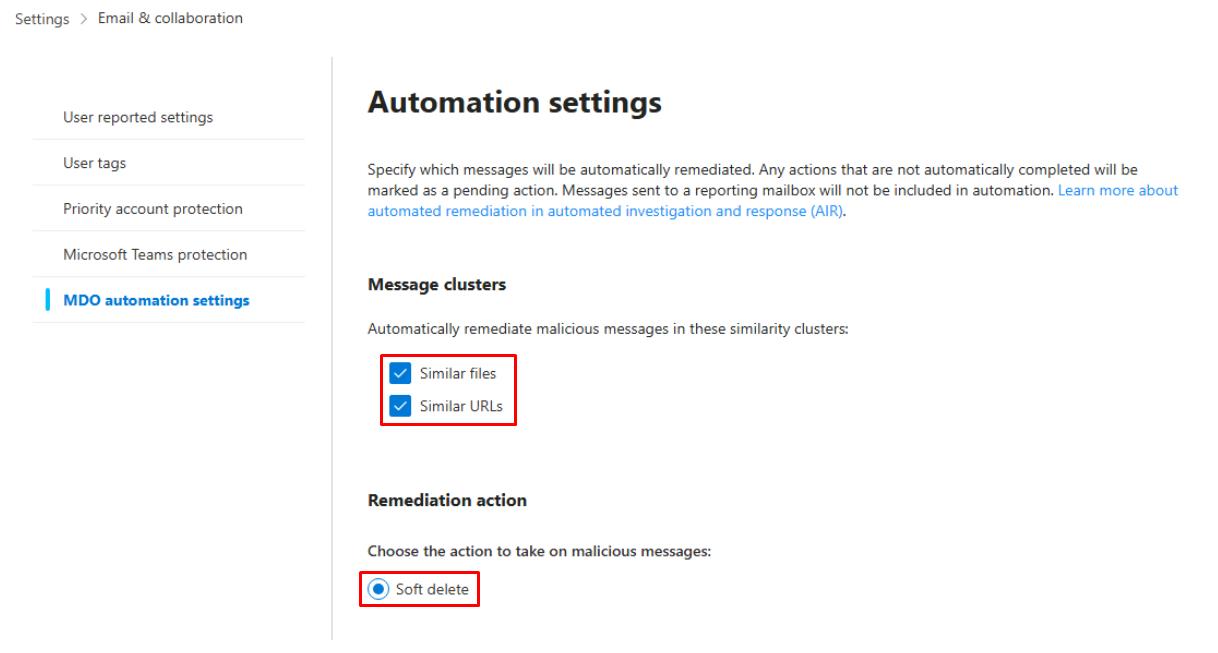
In the menu, select MDO automation settings.
-
Under Message clusters, select the following:
- Similar files
- Similar URLs
Automatically remediates malicious messages in these similarity clusters.
-
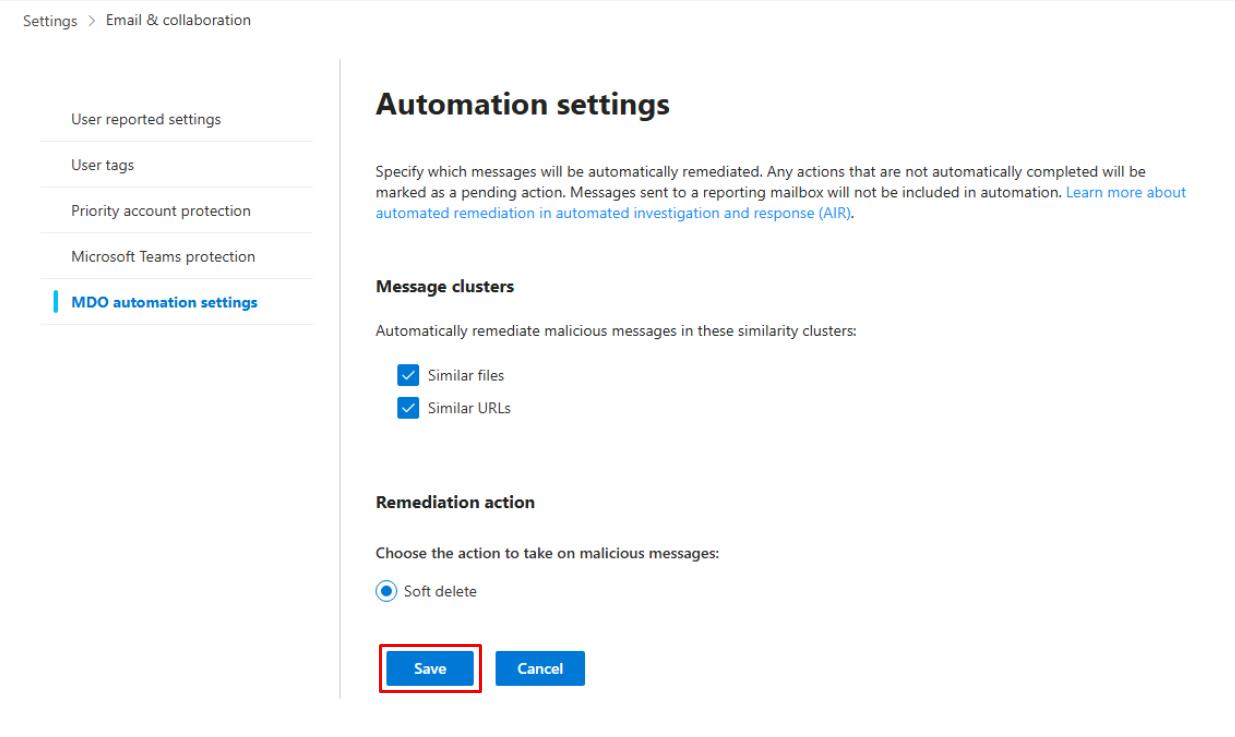
Ensure Remediation action is set to Soft delete.
-
Select Save.
-
In the leftmost pane, go to System > Settings.
-
Select Endpoints.
-
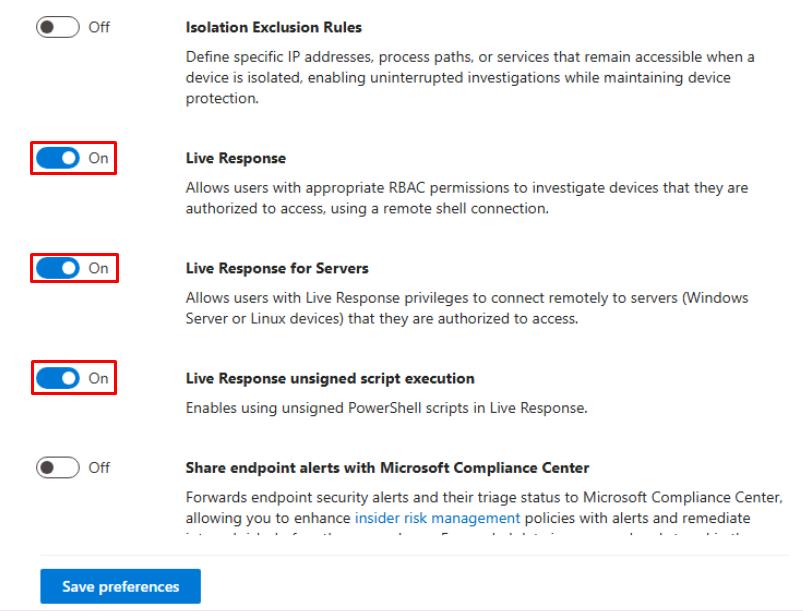
Turn on the following:
- Live Response
- Live Response for Servers
- Live Response unsigned script execution
-
Select Save preferences.
-
In the Endpoints page menu, under Permissions, select Device groups, then observe the results.
Security Engineering and Administration
-
Open your PowerShell ISE window.
-
Select File > New.
-
In the top pane, enter the following script, then replace the value of $SenderUPN with your licensed global admin account.
<# .EXAMPLE This sends an HTML test-phish email from sec-eng to the pilot mailbox. #> # 1) Connect and request Mail.Send scope (interactive) Disconnect-MgGraph -ErrorAction SilentlyContinue Connect-MgGraph -Scopes "Mail.Send" # 2) Script variables - edit these $SenderUPN = "REPLACE WITH YOUR LICENSED GLOBAL ADMIN ACCOUNT" # account you sign in with $PilotUPN = "user1@@lab.Variable(userDomain)" # target pilot mailbox $Subject = "PAYROLL UPDATE - ACTION REQUIRED" $BodyHtml = @" <p>Hello <b>Pilot User</b>,</p> <p>Payroll system requires confirmation of your details. Please <a href='https://example.com/benign-info'>review payroll</a> to avoid delay.</p> <p><i>This is a benign test message for SOC training only.</i></p> <p>- Security Team</p> "@ # 3) Build message hashtable expected by Send-MgUserMail $message = @{ Subject = $Subject Body = @{ ContentType = "HTML" Content = $BodyHtml } ToRecipients = @( @{ EmailAddress = @{ Address = $PilotUPN } } ) } # 4) Send the email (sends from the signed-in user by default) Send-MgUserMail -UserId $SenderUPN -Message $message -SaveToSentItems:$true Write-Host "Test-phish sent from $SenderUPN to $PilotUPN (subject: $Subject)" -
On the top bar, select Run Script.

If stuck signing in. Try closing and reopening PowerShell ISE.
-
If prompted, on the Permissions requested dialog, select Consent on behalf of your organization, then select Accept.
The script seeds and sends a test phishing message from your global admin account to Lab User One.
SOC Analyst
-
Go back to your Defender XDR portal tab.
-
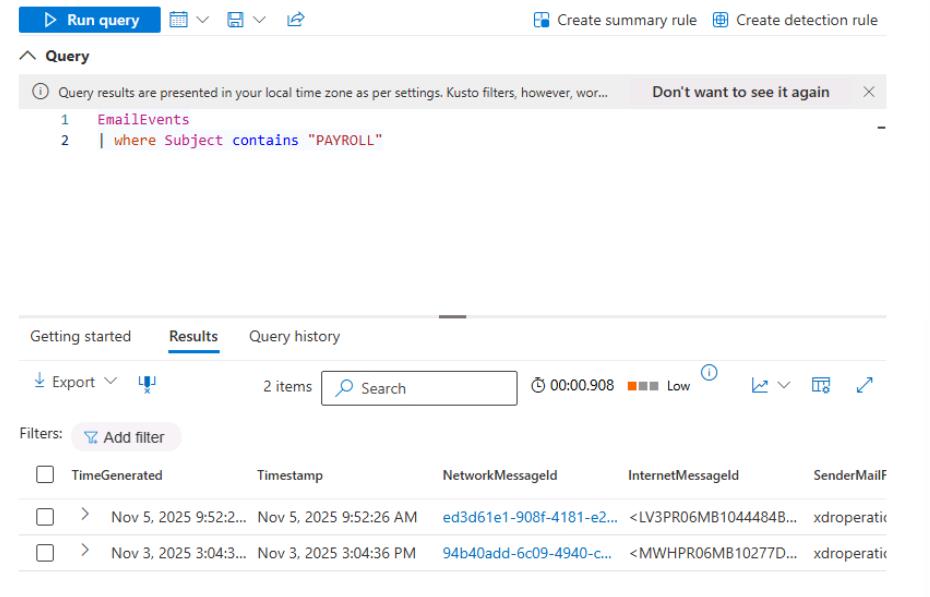
In the leftmost pane, go to Investigate & response > Hunting > Advanced hunting.
-
Run the following query to find the test emails sent by Engineering:
 EmailEvents
 | where Subject contains "PAYROLL"